Hello Bakers,
This week - it's macarons. This is a flavor inspired by one I taught at Sur La Table a few weeks ago. For those of you who have mastered macarons - can we ever have too many flavors?
In class, we tinted the simple almond shell orange and paired it with an orange buttercream. It was good but I knew we could make it better and more authentically "creamsicle".
Remember running after the ice cream truck? I do. My favorites were rocket pops or "creamsicles", tart orange popsicle outside and creamy vanilla ice cream inside. Yum.
To translate that into a macaron, we need to get some orange flavor in the shell and a creamy vanilla flavor inside.
Orange extract or orange blossom water is going in the shell and a creamy vanilla buttercream filling will be sandwiched in between.
You could take this even further and make ice cream sandwiches with good vanilla ice cream. Macaron ice cream sandwiches keep, for a least a week in the freezer, but there is no way they would last that long.
Let me know if you have questions.
And if you would like a set of Macaron templates sent to you - just email me.
Happy Baking!
Colette
“Creamsicle Macarons”
Makes 26-28 cookies
Note: recipe may be cut in half
Equipment:
Stand or Hand held mixer
Large bowl
Flat rubber spatula
Food processor
Piping bag
#12 Wilton tip or Ateco #803 or any plain round tip with a 3/8” diameter opening
Eye dropper – optional but good for adding color and flavor
2 Half sheet trays lined with parchment or Silpats.
Macaron mise en place
Ingredients:
150g powdered sugar
85g ounces almond meal
85g ounces egg whites
Pinch cream of tartar (1/8 teaspoon)
75g ounces granulated sugar
½ teaspoon orange extract or orange blossom water
Orange gel color
Preheat oven to 325 degrees (conventional) 300 degrees (convection).
1. Layer the powdered sugar and almond meal in a food processor or mini-prep fitted with a metal blade.
Layered powdered sugar and almond meal
2. Pulse the powdered sugar and the almond meal in a food processor until the mixture looks like fine meal. This takes about 15 seconds or 8 pulses.
3. Using a stand or hand held mixer, whip the egg whites with the cream of tartar on medium speed until they look frothy and no egg white liquid remains. They will still have a yellowish cast and no structure.
Egg whites and cream of tartar - ready to go....
4. With the mixer running, add the sugar slowly. Once the sugar is added turn the mixer on to medium high speed.
5. Continue to whip until the meringue is soft and shiny. At this stage it resembles “marshmallow fluff” and does not form a peak.
6. Stop the mixer and add color and orange extract.
Color and flavor are added....
7. Turn the mixer to high speed, whip the egg whites until the mixture begins to look dull and the lines of the whisk are visible on the surface of the meringue.
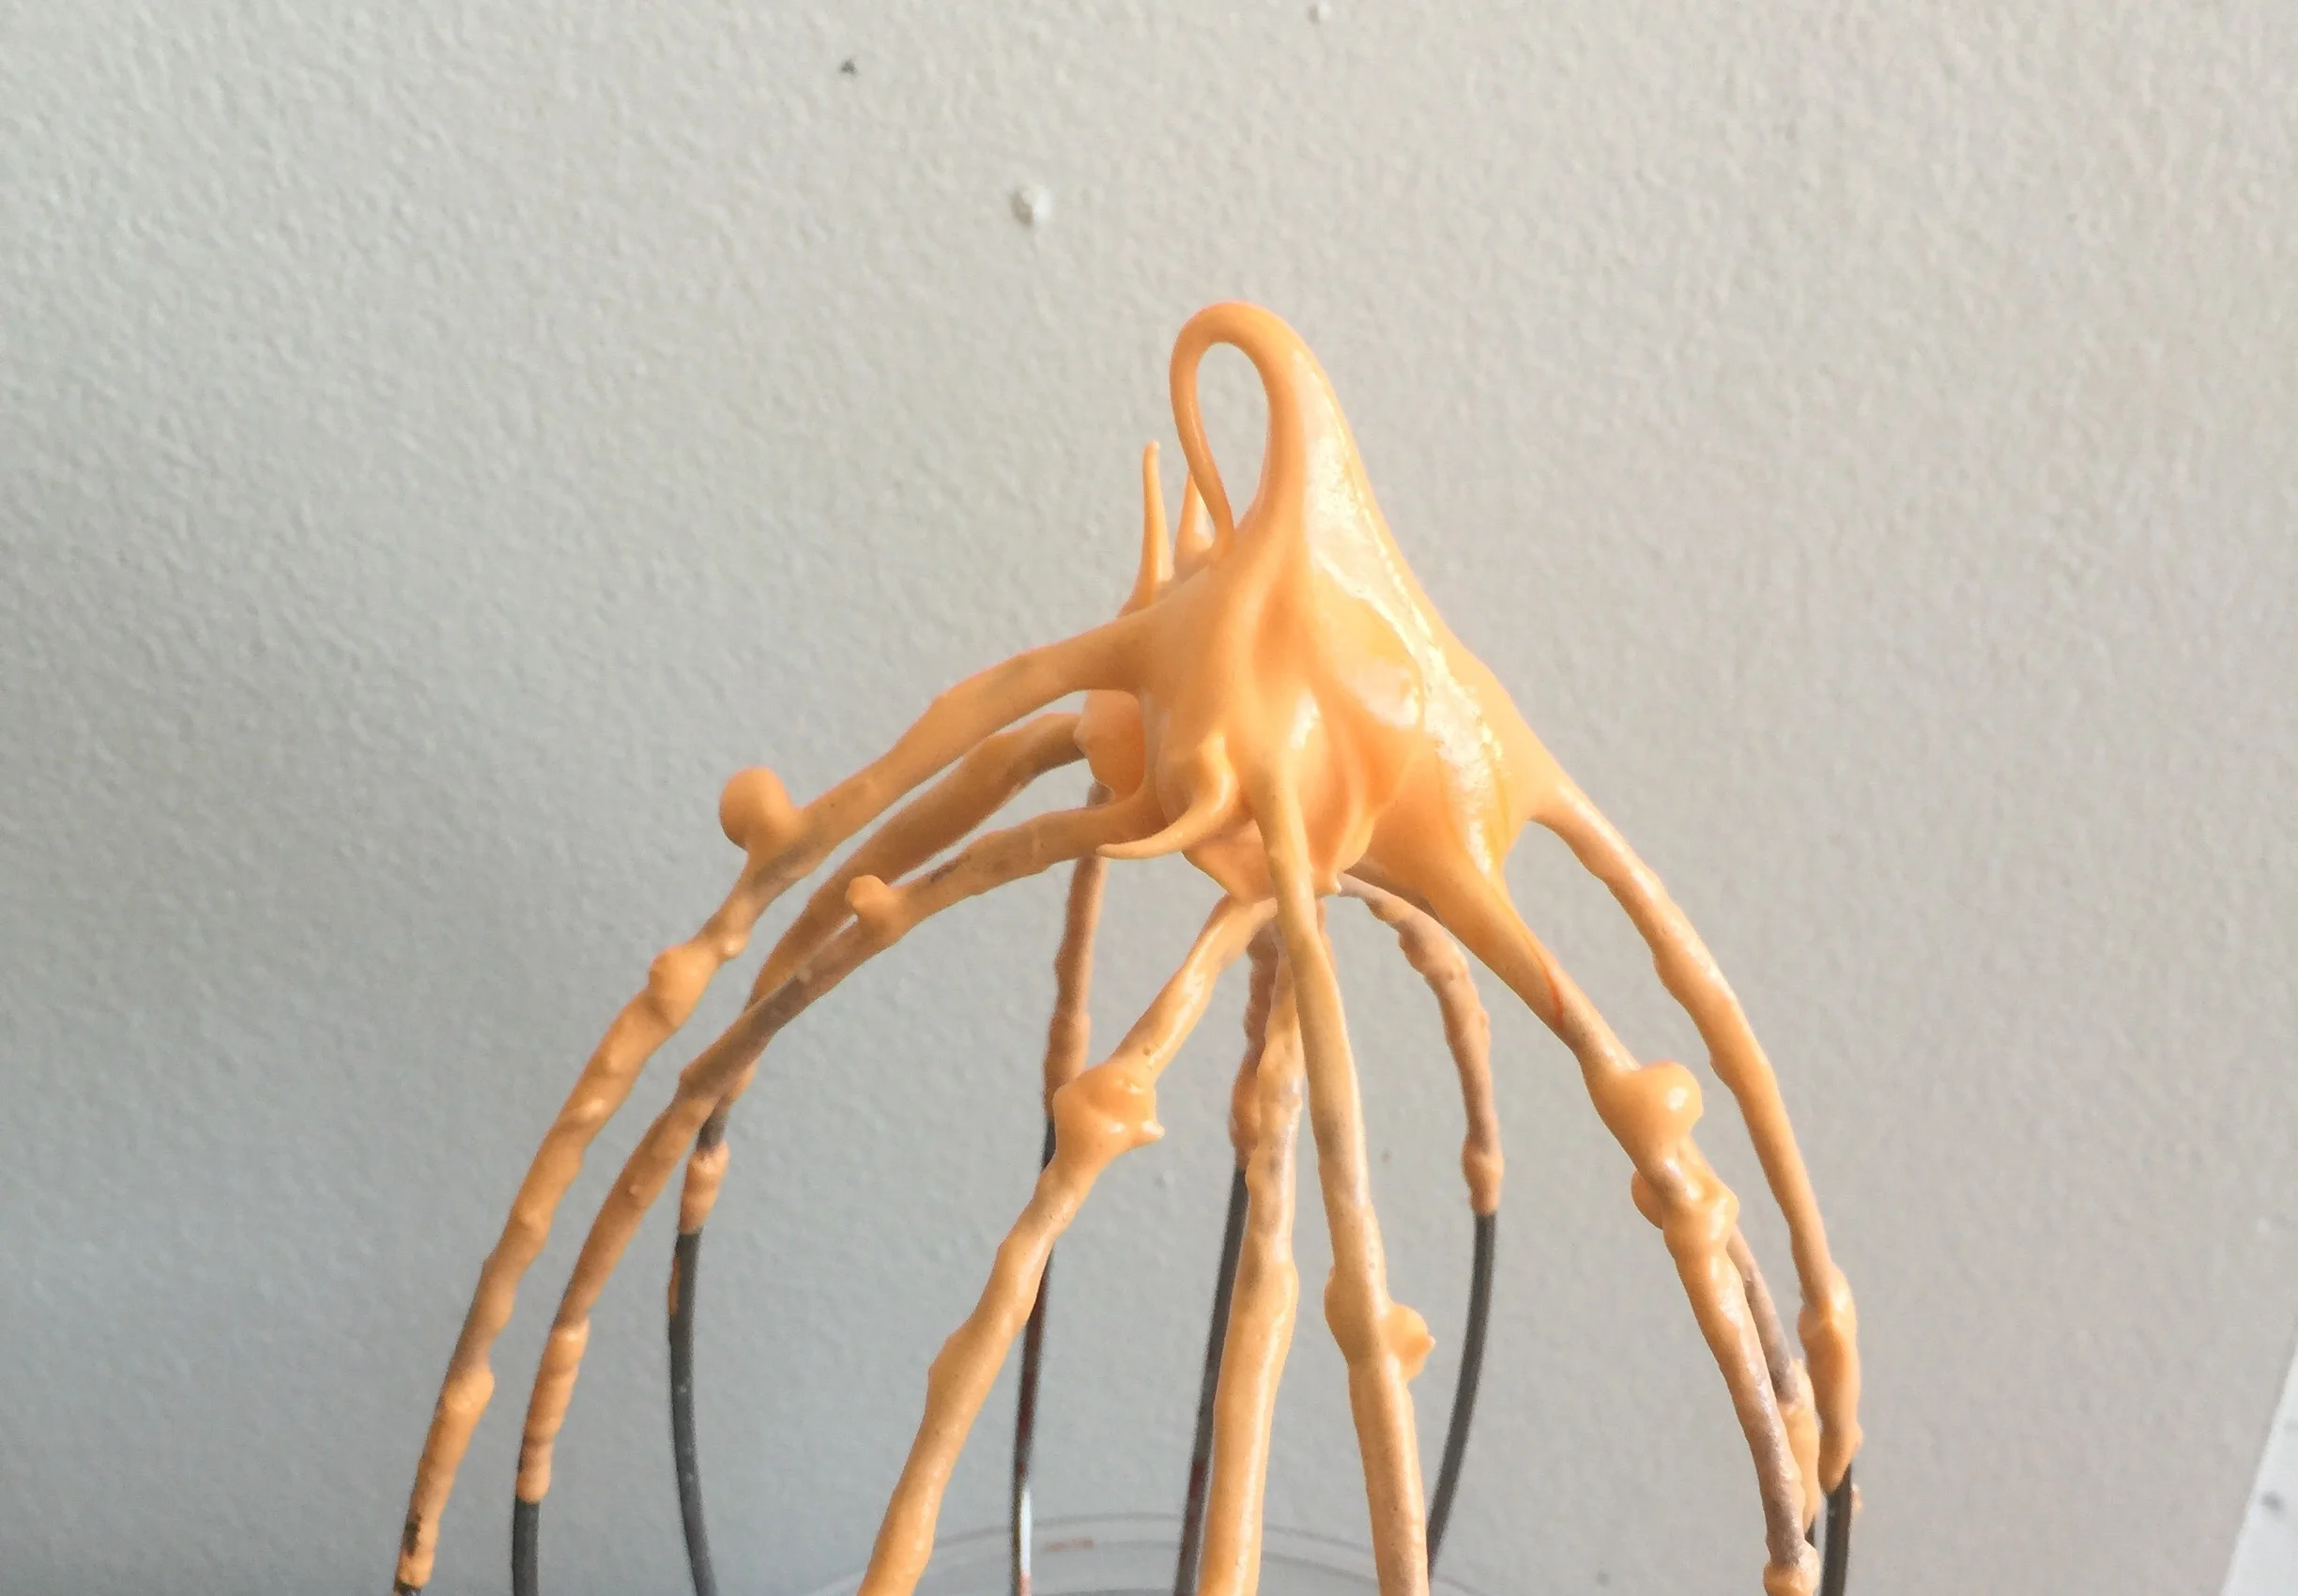
8. Now check for peak. The peak should be firm with the angle supporting the peak at 11:30. (see photo) Transfer to a medium sized bowl.
There's the peak....
9. Fold in the almond meal and powdered sugar in three increments.
10. Paint the mixture halfway up the side of the bowl, using the flat side of your spatula. Then scrape the mixture down to the center of the bowl.
11. Repeat 2-3 times then check to see if the mixture slides slowly down the side of the bowl.
12. Pipe on parchment or Silpat lined baking sheets.
Freshly piped and shiny...
13. Slam the tray, hard, 4-6 times on the counter. Then fist bump each side of the tray twice. (see photo)
14. Let dry until they look dull but not overly dry. **Drying time varies on humidity.
Dull - no longer shiny
In a dry climate the macarons can dry in 15-20 minutes and in a humid climate it can take 35-40 minutes. But never dry them for more than an hour.
15. While the macarons are drying, preheat the oven to 325 degrees, 170 Celsius, Gas Mark 3
16. Place on the middle rack of the oven.
17. Check in 11 minutes.
18. If their tops slide then bake for 2 -3 more minutes. They should release from the parchment or Silpat without sticking. Check one or two. If they stick put them back in the oven for 1-2 more minutes.
19. Let them cool for a few minutes before removing from the Silpat or parchment paper.
Filling:
Not so Sweet Vanilla Buttercream
Yield about 12 ounces (340g)
Equipment
Stand mixer fitted with the paddle attachment
Spatula
Vanilla Buttercream Mise en Place
Ingredients
4 ounces (114g) butter, not overly softened but not cold
8 ounces (227g) powdered sugar, sifted
¼ teaspoon salt
2 teaspoons Amoretti or other vanilla extract
1 tablespoon sour cream or yogurt
1. Put the butter in the mixer bowl. Mix on low speed for one minute, change the speed to medium speed and mix another two minutes
2. Stop the mixer and add half the sugar. Mix on low speed until the sugar is incorporated, then mix on medium speed for two minutes.
3. Add the second increment of sugar. Mix on low speed until the sugar is incorporated, then mix on medium speed for two minutes.
4. Add the vanilla and sour cream mix on medium high speed for four minutes.
This buttercream will keep in the refrigerator for one week and in the freezer for one month.
Thaw it overnight in the refrigerator and paddle it in the mixer on medium speed before using.
Fill, chill for a little while to let the filling set up and enjoy...


