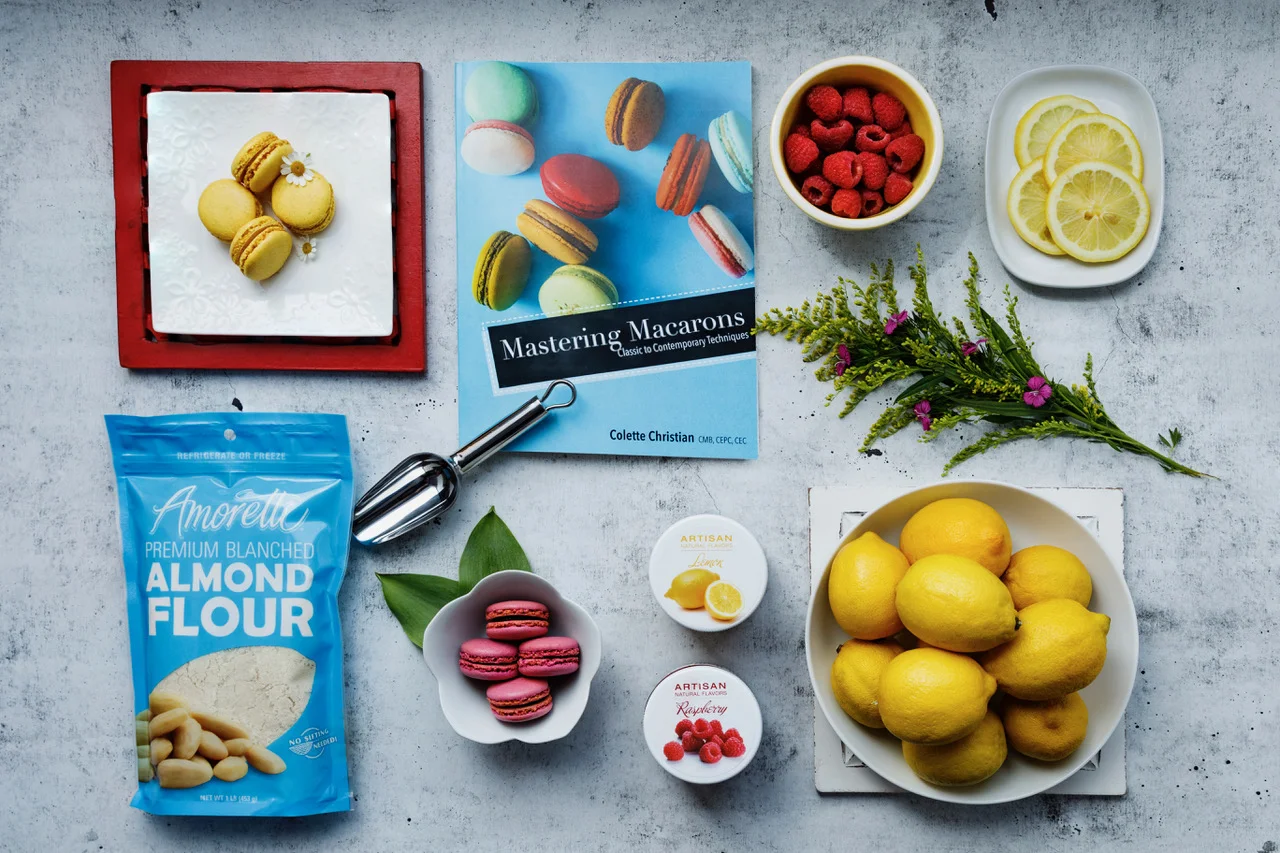
Monday, April 8, 2013

Craftsy's One Day All Catalog Sale!


Hi Everyone,

Today Craftsy has put all it's class on sale - the sale is live through midnight tonight.
Take advantage of this great deal to enhance your knowledge and crafting skills.
I am in several classes myself - they are so much fun.
Happy Baking and Crafting!
Colette
http://www.craftsy.com/ext/ColetteChristian_holiday

Chocolate Cupcakes with Fluffy Chocolate Icing

Hi Everyone,

I am finally able to write - my schuedule has been busy the past two months. But today I have a chance to pass on a much requested recipe.
These cupcakes never fail to please - they are delicious and easy to put together,
They present a great opportunity to practice your rosettes. 
Devil’s Food Cake

Makes 1 10” cake or ½ sheetpan or 24 medium sized cupcakes
Grease pan and line bottom with parchment paper, or line muffin tin with paper baking cups
Oven 350 degrees

4 ½ ounces eggs
12 ounces sugar
2 teaspoons vanilla

3 ounces Dutch process cocoa
½ ounce (1 tablespoon level) 14g baking soda
½ teaspoon salt
10.5 ounces all purpose flour

7 ounces vegetable oil
7 ounces buttermilk
8 ounces brewed coffee - cooled

1.        In a mixer with the whisk attachment ribbon the eggs, sugar and vanilla together on medium speed until the mixture is light and very pale yellow.
2.       Sift together the dry ingredients 2x.
3.       Whisk the oil, buttermilk and coffee together.
4.       Alternate adding the flour mixture and the oil mixture to the ribboned eggs and sugar.
5.       It should go dry, wet, dry, wet and end with dry.
6.       Pour the batter into the pan – it will be quite loose. A measuring cup works well for this.
7.       Bake the cake at 350.
8.       Start checking in 40 minutes – the cake is done when a skewer inserted in the center comes out clean. **Start checking the cupcakes at 20-25 minutes.

Basic Fudge Icing

14 ounces (3 ½ sticks) butter
22.5 ounces (5 and 2/3 cups) sifted powdered sugar
4.5 ounces sifted cocoa powder
1 Tablespoon vanilla
1/2 cup milk

1.        With the paddle attachment whip the butter until light and fluffy.
2.       Sift together the powdered sugar and the cocoa.
3.       On low speed add 1/3rd the sugar and cocoa mixture to the butter.
4.       Add the milk and vanilla.
5.       Add the remaining powdered sugar and cocoa.
6.       Whip until light and fluffy.

Note:  Recipe may also be divided in half if you only need a small amount.

Happy Baking!
Colette

Thursday, February 14, 2013

Craftsy's Valentine's Sale

Hi Everyone,

Craftsy is having a great Valentine's Day Sale. Sign up for all those classes that you have been wanting to take.
The sale runs through Sunday February 17.
http://www.craftsy.com/ext/ColetteChristian_holiday
Happy Baking!
Colette

Wednesday, January 30, 2013

Best Chocolate Chip Cookie Recipe

Hi Everyone,


Chocolate chip cookies - that all American treat - so simple - so heartwarming -
and yet so much can go wrong.
This cookie was created in 1930 when Innkeeper Ruth Wakefield stirred some chopped
chocolate into her butter cookie dough. The rest is history.
The most commonly used recipe is the one right off the Nestle chocolate chip bag.
I used it and four other recipes to compose the following chocolate chip cookie recipe -
which is nearly foolproof. My first recipe testers where a group of teenage bakers attending
Summer Studio - an annual event for high school juniors and seniors hosted by the Art Institutes.
I need a recipe they could follow and did not require the usual chilling time - as we were on a tight schedule.
Not that you couldn't give these a nice 10 minute rest in the refrigerator - but it is not necessary for success.
Here is the recipe:


Chocolate Chip Cookies
About 4 dozen 3” cookies
Oven 350

8 ounces (226 grams) butter
5 ounces sugar (150 grams)
5.5 ounces light brown sugar (160 ounces)
2 eggs
1 ½ teaspoons vanilla extract
12.5 ounces (295 grams) all purpose flour
½ teaspoon baking soda
½ teaspoon salt
1 ½ cups (270 grams) chocolate chips

Optional – 4 1/2 ounces (100grams) walnuts, pecans or macadamia nuts,
toast and chop up coarsely

1.       In the bowl of your electric mixer beat the butter until it is no longer stuck to the paddle
(about 45 seconds).
2.       Add the white sugar, brown sugar and vanilla beat until the butter and sugars are smooth
About 2-3 minutes – do not over cream.
3.       Beat in the eggs one at a time, mixing well after each addition. Stop the mixer and scrape down the mixer bowl as needed.
4.       In a separate bowl – sift together the flour, baking soda and salt.
5.       Add the dry ingredients to the butter and egg mixture and mix only until the flour disappears.
6.       Add the chocolate chips and optional nuts about ½ way through adding the flour.
7.       Scoop the cookies onto a parchment lined sheet pan.
8.       Bake at 350 for about 10 – 14 minutes. They should be a light golden brown.
9.       Do not over bake.

This dough freezes very well. For production the cookies are scooped and placed close together on a parchment lined sheet pan – the tray is then wrapped and frozen.
This is a good way to control waste and food cost.


Soft Batch:
Change sugar amounts to 4 ounces white and 4.5 ounces brown – add one ounce light corn syrup.
The corn syrup goes in with the sugar.
Happy Baking!
Colette


Sunday, January 20, 2013

Macarons Baking

Hi Everyone,

I have been working a lot these past couple of weeks. I apologize that the blog has been quiet.
This weekend I taught 3 macaron classes back to back at Sur La Table - each time I feel like 
I get closer to streamlining the techniques.
Looking back it has been 9 years since I started teaching them. 
9 years ago there was one recipe and very few books - now there are lots of books and even more 
conflicting information.
These are the holy grail of cookies...it is great when you see their little feet (pied) form. That's when you know they will be successful...
Happy Baking!
Colette


Wednesday, December 19, 2012

Holiday stained Glass Sugar Cookies with Cast Sugar

Holiday Stained Glass Cookies

Hi Everyone,

Here is a recipe for stained glass cookies using cast sugar.
If you have a good candy thermometer - these should be easy.
Just be careful when cooking hot sugar.
It is a good idea to clear the kitchen of children, pets and unruly adults
when you are working with it.
I am also including a food safe royal icing if you want to forgo the sugar work.
Happy Baking!
Colette


Sugar Cookies

Yield: Makes about 30 cookies – depending on the size of your cookie cutters.

 3 cups (15 ounces) all-purpose flour, plus more for dusting
½ teaspoon baking powder
1/4 teaspoon salt
1 cup (8 ounces) unsalted butter, at room temperature
1-1/4 cups (10 ounces) sugar
1 large egg
2 teaspoons pure vanilla extract
1 tablespoon milk

In a bowl, whisk together the 3 cups flour, baking powder, and salt. In a large bowl, using a stand mixer on medium-high speed, beat the butter and sugar, about 2 to 3 minutes. Add the egg and vanilla and beat on low speed until the egg is completely incorporated. Beating on low speed, slowly add the flour mixture and continue to beat until almost incorporated. Add the cream and beat on low speed until just incorporated, scraping down the sides of the bowl as needed.

Press the dough into a rough rectangle, wrap tightly in plastic wrap, and refrigerate until firm, at least 1 hour or up to overnight. (The dough can be wrapped well and frozen for up to 1 month.)

Follow the desired recipe for rolling and cutting, or do the following: Preheat the oven to 350 degrees. Line 3 baking sheets with parchment paper. On a lightly floured work surface, using a floured rolling pin, roll out the chilled dough until about 1/8-inch thick. Using cookie cutters or a paring knife, cut the cookies into the desired shapes. Use a metal spatula to transfer the cookies to the prepared sheets, spacing them 1 inch apart. Press the dough scraps together, roll out, and cut out additional shapes.
If you plan to use the cookies as ornaments remember to make a hole at the top for the ribbon or string.
I used a metal knitting needle for this.


Bake 1 sheet at a time until the cookies are lightly golden around the edges but the tops are barely colored, about 12 to 14 minutes.
Let cool on the sheets for 5 minutes. Using the metal spatula, transfer to wire racks and let cool completely, about 30 minutes. the

Decorate the cookies as desired.

How to create the “stained glass effect” using sugar

Once cool place on a silpat lined baking sheet.

Cast sugar:
In a medium sized saucepan place 2 ounces of water, 7 ounces of granulated sugar,
And a quarter sized dollop of light corn syrup.
Using a candy thermometer cook the sugar to 305 degrees Fahrenheit.
Color as desired with a few drops of gel color.
Pour carefully into cookie holes to create windowpane effect.
Let sit one hour before moving.

or

Food Safe Royal Icing

Yield: Makes about 3 cups

4 cups (1 pound) confectioners’ sugar
1/2 cup warm water
3 tablespoons meringue powder – Wilton makes a good one.
3/4  teaspoon extract, such as vanilla or almond (optional)

In a large bowl, combine the sugar, the meringue powder, 1/2 cup warm water, and the extract, if using. Using a stand mixer on medium speed, beat until the mixture is fluffy, yet dense, about 5 to 7 minutes.

To thin the icing, use a rubber spatula to stir in additional warm water 1 teaspoon at a time. To test the consistency, drizzle a spoonful of icing into the bowl; a ribbon should remain on the surface for about 5 seconds.

Place the royal icing in an airtight container. Cover the surface with a damp paper towel – then a lid. Store at room temperature – use within 2 days.


Tuesday, December 11, 2012

Butter Topped Pear and Hazelnut Muffins

Pear and Hazelnut Muffins

Jamie, my wonderful Craftsy assistant and her husband are looking to become innkeepers in Oregon.
As a result, we talk a lot about what to bake for breakfast.
A B&B has to serve a good breakfast. Guests will never return if the offerings are mediocre - no matter how charming the rooms, the view, the location and the innkeepers.
Success depends on a good collection of recipes and menu items should highlight the local fare.
Today's recipe is one for Jamie's new venture.
Both pears and hazelnuts are grown, harvested and processed close to their new B&B.
So this recipe is perfect for them.
As a side note Jamie's grandmother worked for Harry and David for many years - running
the pear division.
If you don't have a hazelnuts nearby these muffins are equal delicious with pecans or walnuts.
Happy Baking!
Colette

Butter Topped Pear Muffins
2 cups all purpose flour (9 ounces)
1 teaspoon baking powder
1/2 teaspoon baking soda
1/2 teaspoon cinnamon
1/8 teaspoon nutmeg
1/4 teaspoon salt
4 ounces butter - melted and cooled
3/4 cup sugar (5 ounces)
2 eggs
1 teaspoon vanilla
2 large pears, peeled, cored and cut into medium (1/4" dice)
3/4 cup (3 ounces) finely chopped hazelnuts

Topping
1/2 cup sugar
1 teaspoon cinnamon'
1/4 teaspoon nutmeg
1. Combine sugar, cinnamon and nutmeg in a small bowl.
3 Tablespoons butter, melted and set aside

Preheat the oven to 350 degrees and line your muffin pan with paper liners or grease
the muffin cups with butter, shortening or pan spray.
1. Sift flour, baking powder, baking soda, cinnamon, nutmeg and salt in a large bowl.
2. In another bowl combine butter, sugar, eggs and vanilla - whisk until well combined.
3. Add the wet ingredients to the dry ingredients just until the dry ingredients disappear.
4. Mix in the pears and the hazelnuts.
5. Scoop the batter into the prepared pan.
6. Bake at 350 degrees - start checking at 25 minutes.
7. The muffins are done when a skewer inserted in the center comes out clean.
When the muffins are done - brush the muffin tops with melted butter and dip in the cinnamon sugar mix.
These muffins freeze beautifully.
Enjoy!


Thursday, November 8, 2012

Perfect Yellow Cake (Cupcakes) with butter not shortening

Hi Everyone,

So sorry it has been so long between posts. I have been teaching like crazy.
But I am back now and I have several delicious posts planned for the holidays.


Today's post is for Perfect Yellow Cake...
I used this recipe for a lovely strawberry "shortcake" cupcake - so simple and so delicious.
This cake falls into the "hi-ratio" category. It has more sugar then flour and is not mixed by the usual
creaming method or ribbon method.
It is so tender - perfect golden crumb.
It took 6 tests to get this one spot on - I wanted to use butter and not the usual emulsified shortening so it was tricky at first.
But here it is - give it a try.
The recipe also includes how to turn them into the strawberry "shortcake" cupcake
Here is the photo:


Perfect Yellow Cake (Cupcakes)

Makes 2 9” cake, 1 13x9” cake and 13(baker’s dozen)cupcakes

4 large eggs
½ cup milk
2 teaspoons vanilla extract
2 ¼ cups (9 ounces sifted cake flour) – spoon and sweep
1 ½ cups sugar
2 teaspoons baking powder
1/2  teaspoon salt
2 sticks of unsalted butter (8 ounces)
cut into 8 pieces.

Equipment: 12 cup muffin pans or 12 silicone muffin cups
Or 2 9” can pans grease well with butter or shortening and line the bottom with parchment paper. Grease or butter the parchment paper tool.
Oven 350 degrees
Other Equipment: Stand mixer or handheld mixer.
Rubber spatula
Cooling rack
Timer for mixing and baking times

1.     Whisk together eggs, milk, and vanilla until just mixed.
Just combined – eggs should be incorporated but do not over whisk.
2.    Place all the dry ingredients in the mixer bowl.
3.    With the mixer on low speed – add the butter one chunk at a time.
Mix until the butter and flour look sandy and pebbly with pieces about the size of peas.
4.    Stop the mixer and add 1 cup of the milk, egg and vanilla mixture.
And mix at the lowest speed until incorporated. Then mix at medium speed for 1 minute. The batter will now be light and fluffy.
5.    Return the mixer at low speed, turn it back on and add the remaining milk mixture. Mix until incorporated about 20-30 seconds. Turn off mixer and scrape down the bowl.
6.    Then turn the mixer up to medium speed and beat until combined,
15-20 seconds – the mixture may look a little broken but that is fine.
7.    Scoop or spoon the mixture into prepared pan. The batter should stop ¼” below the top of the cupcake liners.
8.    Start checking for doneness in about 20 minutes. The cupcakes are done when a skewer or cake tester comes out clean.
9.    Place on a cooling rack to cook for about 30 minutes.
10.                       Cupcakes should be completely cool before decorating.


Directions for using the hand held mixer.

1.    Whisk flour, sugar, baking powder and salt together in a large bowl.
2.    Whisk the eggs, milk and vanilla together.
3.    Add butter pieces and cut in with a pastry blender until the butter pieces are the size if peas. You can use a bowl scraperor a fork or if your hands.
4.    Add one cup of the milk mixture, and mix on the lowest speed until just incorporated about 20-30 seconds.
5.    Stop the mixer and scrape down the sides of the bowl.
6.    Add the remaining milk mixture, mix on low speed just until
it combines and then turn up the speed to high and mix for 1 minute until light and fluffy, Scrape down the bowl and mix for 15 more seconds.

Notes:


Perfect Whipped Cream
Equipment:
Medium size bowl
Whisk

8 ounces heavy cream - *Trader Joe’s brand is my favorite
2 Tablespoons powdered sugar – sifted
1/2 teaspoon vanilla

1.    To help the cream whip faster, chill the bowl and whisk in your freezer for 20 minutes.
2.    Pour the cream in the bowl and whisk vigorously until
it is the consistency of Greek yogurt.
3.    Add the sifted powdered sugar and vanilla and continue to whisk until you can see the lines of the whisk.
Turn the bowl upside down and check to see if the cream
slides out. It should still look smooth and light.
Chill until ready to use. It may have to be rewhisked slightly if it sits in the refrigerator for a while.
Do not overwhip.

Macerated Strawberries
1 pint strawberries, washed, dried hulled and quartered
3 tablespoons sugar
½ teaspoon vanilla
or 2 Tablespoons Gran Marnier or Cointreau

1.    Place strawberries in a bowl, add remaining ingredients
and stir.
2.    Let sit for about 20 minutes for the sugar to dissolve and the flavors to blend.

                  Assembling your Cupcakes

Mise en Place:
Baked cupcakes
Whipped Cream
Macerated strawberries
A few strawberries for garnish

Equipment:
Cutting board
Serrated Knife
Piping bag
Star tip
Melon baller or spoon
Extra powdered sugar and strainer

1.    Cut top off of cupcakes – reserve
2.    Spoon out  some of the cake base center.
3.    Fill hole with strawberries
4.    Pipe a large rosette of whipped cream on top of berries
5.    Sift powdered sugar on reserved cupcake top.
6.    Place top on cream.
7.    Garnish with a fanned strawberry if desired.

Happy Baking!
Colette


Monday, September 17, 2012

Banana, Chocolate Chip and Walnut Muffins


Hi Everyone,

Today, I was thinking about some of my old baking jobs.
One of them was at a coffeehouse in Worcester, Mass.
It was right off Tatnuck Square for those of you who know Worcester.
The place would be called vintage today or retro but back in the 90s it was just old.
But it served great coffee and they had good music.
It had the crankiest convection oven on the planet - it took a while
for me and this oven to come to terms but we did.
I remember not being able to keep up with the production - everything
I made was sold as soon as it went into the small vintage baking case.

So today's entry is a popular muffin from those long ago days.
These are rich and delicious - nothing held back - use really ripe bananas.
I always have a collection of bananas in the freezer.
They thaw quickly in a bowl on the counter.
Happy Baking!

Banana, Chocolate Chip and Walnut MuffinsOven 350Line a muffin pan with muffin linersEquipment:2 bowls1 whiskscale or measuring cupsspatulascoopteaspoons2 1/4 cups (12 ounces all purpose flour)2 teaspoons baking powder1/2 teaspoon cinnamonpinch salt1. Combine the above ingredients in a medium bowl and whisk to combine.
1/2 cup vegetable oil, (can be corn, canola or grapeseed)1 cup (7 ounces sugar)2 eggs1 teaspoon vanilla3 very ripe bananas1 cup chocolate chips1 cup chopped walnutsTopping**cinnamon sugar4 Tablespoons sugar mixed with 1/2 teaspoon of cinnamon1. Combine the dry ingredients in a medium bowl and whisk to combine.2.. In the second bowl whisk together the above ingredients until everything is very smooth and the bananas are truly broken down and well combine with everything else.3. Then add the wet ingredients with the dry ingredients and mix until all of it is mixed - about 15 strokes with the spatula should do it.Do not over mix.4. Add the chocolate chips and the walnuts.5. Scoop the muffins into the prepared pan.6. Sprinkle with cinnamon sugar7. Bake at 350 degrees - start checking at 25 minutes.A skewer inserted in the center should come out clean.These muffins freeze really well.Happy Baking!