
Hello Bakers,
These past few weeks have been so busy. At work we recently acquired a pastry case and it is my job to fill it. The pastry case is part of the school cafe. It has to be set up by 7:00 AM - which means I am in the kitchen at 5:00. It takes about a half hour for my oven to heat up so being late is not an option - I have to start loading it by 5:40 or the pastries will not be out on time.
Having a case is exciting. It is a fair amount of responsibility and a daily place to showcase work. By the end of the day it is empty or almost empty and the next day I have to start all over - well almost.
I do have some things made ahead - all professional bakers do or else we would never be able to keep up and would most likely run screaming into the woods. This actually happened to one of my baking instructors at school - in a future post I will recount that tale..
Having a pastry case is a daily testament to the old saying "if you build they will come". Each day more product sells...and then I have to increase production, be more creative and work faster. It's exhausting and exhilarating at the same time. I wish this was all I was doing but I am also teaching a full load so it is a little tiring but I am just trying to push through. I am grateful for my student's help.
The first week I was cautious and getting up speed, By the second week I was faster and able to add more desserts, this week is the third week and we will see what happens.
One item sells better then any other (so far) and that is the quick and easy "420" bars. Our cafe manager named them as I am told they are the perfect sweet treat when an attack of the munchies hits.
These also are quick to make if you need a a quick bake sale or classroom treat. Might be better to call them "Magic Bars" in those instances.
As the weeks go on I will be adding more and more to the case - I will share my most popular recipes with you, my bakers, right here on the blog.
Happy Baking!
Colette
And finally the recipe for "420" Bars...
Yield: 15 large bars
24 small bars
Equipment:
2 1/2 sheet pans
Medium bowl
Microwave or saucepan for melting butter
Plastic wrap
Parchment paper
2 tablespoons melted or softened butter for greasing the pan.
If you have “pan spread”** on hand you can use that. Recipe is right below.
Pan Spread
An easy do it yourself pan spread that is better for your baking and the environment.
Small saucepan
Whisk
1 stick, 4 ounces, 113g unsalted butter or vegetable shortening
2 Tablespoons, 1 ounce, (28g) unbleached all purpose flour
In a small saucepan, melt the butter or shortening over medium heat.
Turn off heat, add flour and whisk until smooth.
Pan spread made with butter lasts for two weeks in the refrigerator, made with vegetable shortening lasts six months in the refrigerator.
How to use: Brush on pans whenever the recipe calls for spray.
Back to the bars....
Ingredients:
10 ounces graham cracker crumbs
8 ounces melted butter
8 ounces toasted and chopped pecans – you could also use walnuts or macadamia nuts
12 ounces chocolate chips
6 ounces butterscotch chips
6 ounces white chocolate chips
2 cans (15 ounces) sweetened condensed milk

1. Preheat the oven to 350 degrees.
2. Prepare your pan by lightly greasing the sides and bottom with melted butter or brushing with
Pan spread. Line the pan with parchment paper cut to allow a 1” overhang above the lip of the pan.
3. Combine the graham cracker crumbs and butter in the bowl and stir until the crumbs are moistened.
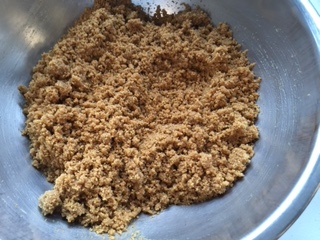
Graham Cracker Crumbs and Melted Butter
4. Dump the crumbs and butter in the pan and distribute evenly in a thin layer.

Packed Crumbs
5. In order to get a nice packed crust cover the crumbs with plastic wrap and press another sheet pan on top of the plastic. Remove pan and plastic wrap.

Plastic wrap over crumbs...

Press down hard to get a compact crust.
6. Sprinkle the pecans evenly over the surface of the crust.
7. Sprinkle the chocolate chips evenly over the crust .
8. Sprinkle the butterscotch chips evenly over the crust
9. Sprinkle the white chocolate chips evenly over the crust

Chip ahoy
10. Carefully pour the two cans of condensed milk over the crust.

Pour condensed milk evenly over the surface
11. Bake at 350 for 25-30 minutes.
12. The bars should be an all over light golden brown.

Perfect golden brown.
If possible let them sit for 45 minutes before cutting.
They store well in an airtight container if there are any left over.
These are a spin on a classic bar cookie that has several other names - magic bars, layer bars, etc. But I think you will like my take on them.
They are quick and easy - they can be made in under an hour.
Let me know if you have questions.
Happy Baking!
Colette
"420" Bars