• Home
  • Recipes and Blogposts
  • TheDoughDr Archived Episodes
  • About
  • Ingredient and Baking Videos
Menu

Baking With Colette

Certified Master Baker, Craftsy Instructor, Teaching you to bake your best!
  • Home
  • Recipes and Blogposts
  • TheDoughDr Archived Episodes
  • About
  • Ingredient and Baking Videos

Looking for a perfect bake? Search Recipe and Blogposts below:


Subscribe

Sign up with your email address to receive news and updates.

We respect your privacy.

Thank you!
I am a Craftsy Instructor. www.craftsy.com

I am a Craftsy Instructor. www.craftsy.com

Tweets by BakingwColette

Red Velvet Wedding Cake with Vanilla Bean Buttercream #nakedcake #pastrychef #amoretti #redvelvetcake #baking #laweddings Macaron madness at Art Institute - for Portfolio Show! Rose petal shells with Champagne buttercream and S'mores....#amoretti #macaron #pastrychef #baking
You made it to Friday - indulge with a chocolate chip scone...#5250 #pastrychef #baking #delicious Mini Apple Pies ready for the case at #5250 cafe! Fall baking is in full swing. #baking #fallbaking #apples #applepie #pastrychef #amorettiarmy Croissants fresh out if the oven at 5250 Cafe. #croissant #5250 #amoretti #pastrychef #baking #foodporn Tango Apple Cake with Caramel Icing - new recipe post at BakingwithColette.com. Get inspired for your fall baking today #apples #baking #cake#caramel Cranberry Orange Scones for 5250 Cafe.  Perfect with morning coffee.....Start your day with something sweet. #baking #amorettiarmy #baker #bakery##5250 Chef Rossi competing at Art Institute of Los Angeles - ACF category cold plating desserts :)
Go Chef!!!! #plated desserts There is a theory that Brioche a tete were modeled after Marie Antoinette's breasts -!if true then she was the patron saint of small breasted women. These are so yummy and delicious. #baking#marieantoinette #delicious #brioche#5250 #bread

Heart Shaped Croissants

Croissant - Finishing Valentine's Small Batch

February 13, 2023

Croissants for two - Part Two - Shaping, Filling and Baking

This is part two of our Valentine’s croissant for two, the shaping, proofing and baking.
We started the show with some great questions and then demo. Demo started with some love cheese filled hearts - my epic fail gondolas (one must try) and a finish with the classic pain au chocolat. Here is a link to the show. Saturday DoughDr Episode

And Bakers, I forgot to show you how I shape the scraps into yummy rolls but I made a video and the is at the bottom of the post. So, ready set bake!

Bakers - after your dough has rested in the refrigerator for a few hours or in the freezer for up to one month - it is time to shape, proof and bake.

If shaped later in the day the croissants can proof slowly overnight in the refrigerator and then be baked fresh first thing in the morning. 

Today’s shaping is Valentine’s Day themed but this dough can be cut into 4” squares and shaped into luscious pain au chocolat or savory ham and cheese.

For an extensive tutorial on making,shaping, proofing and baking  croissants, take a look at my Craftsy class Craftsy Croissant Class

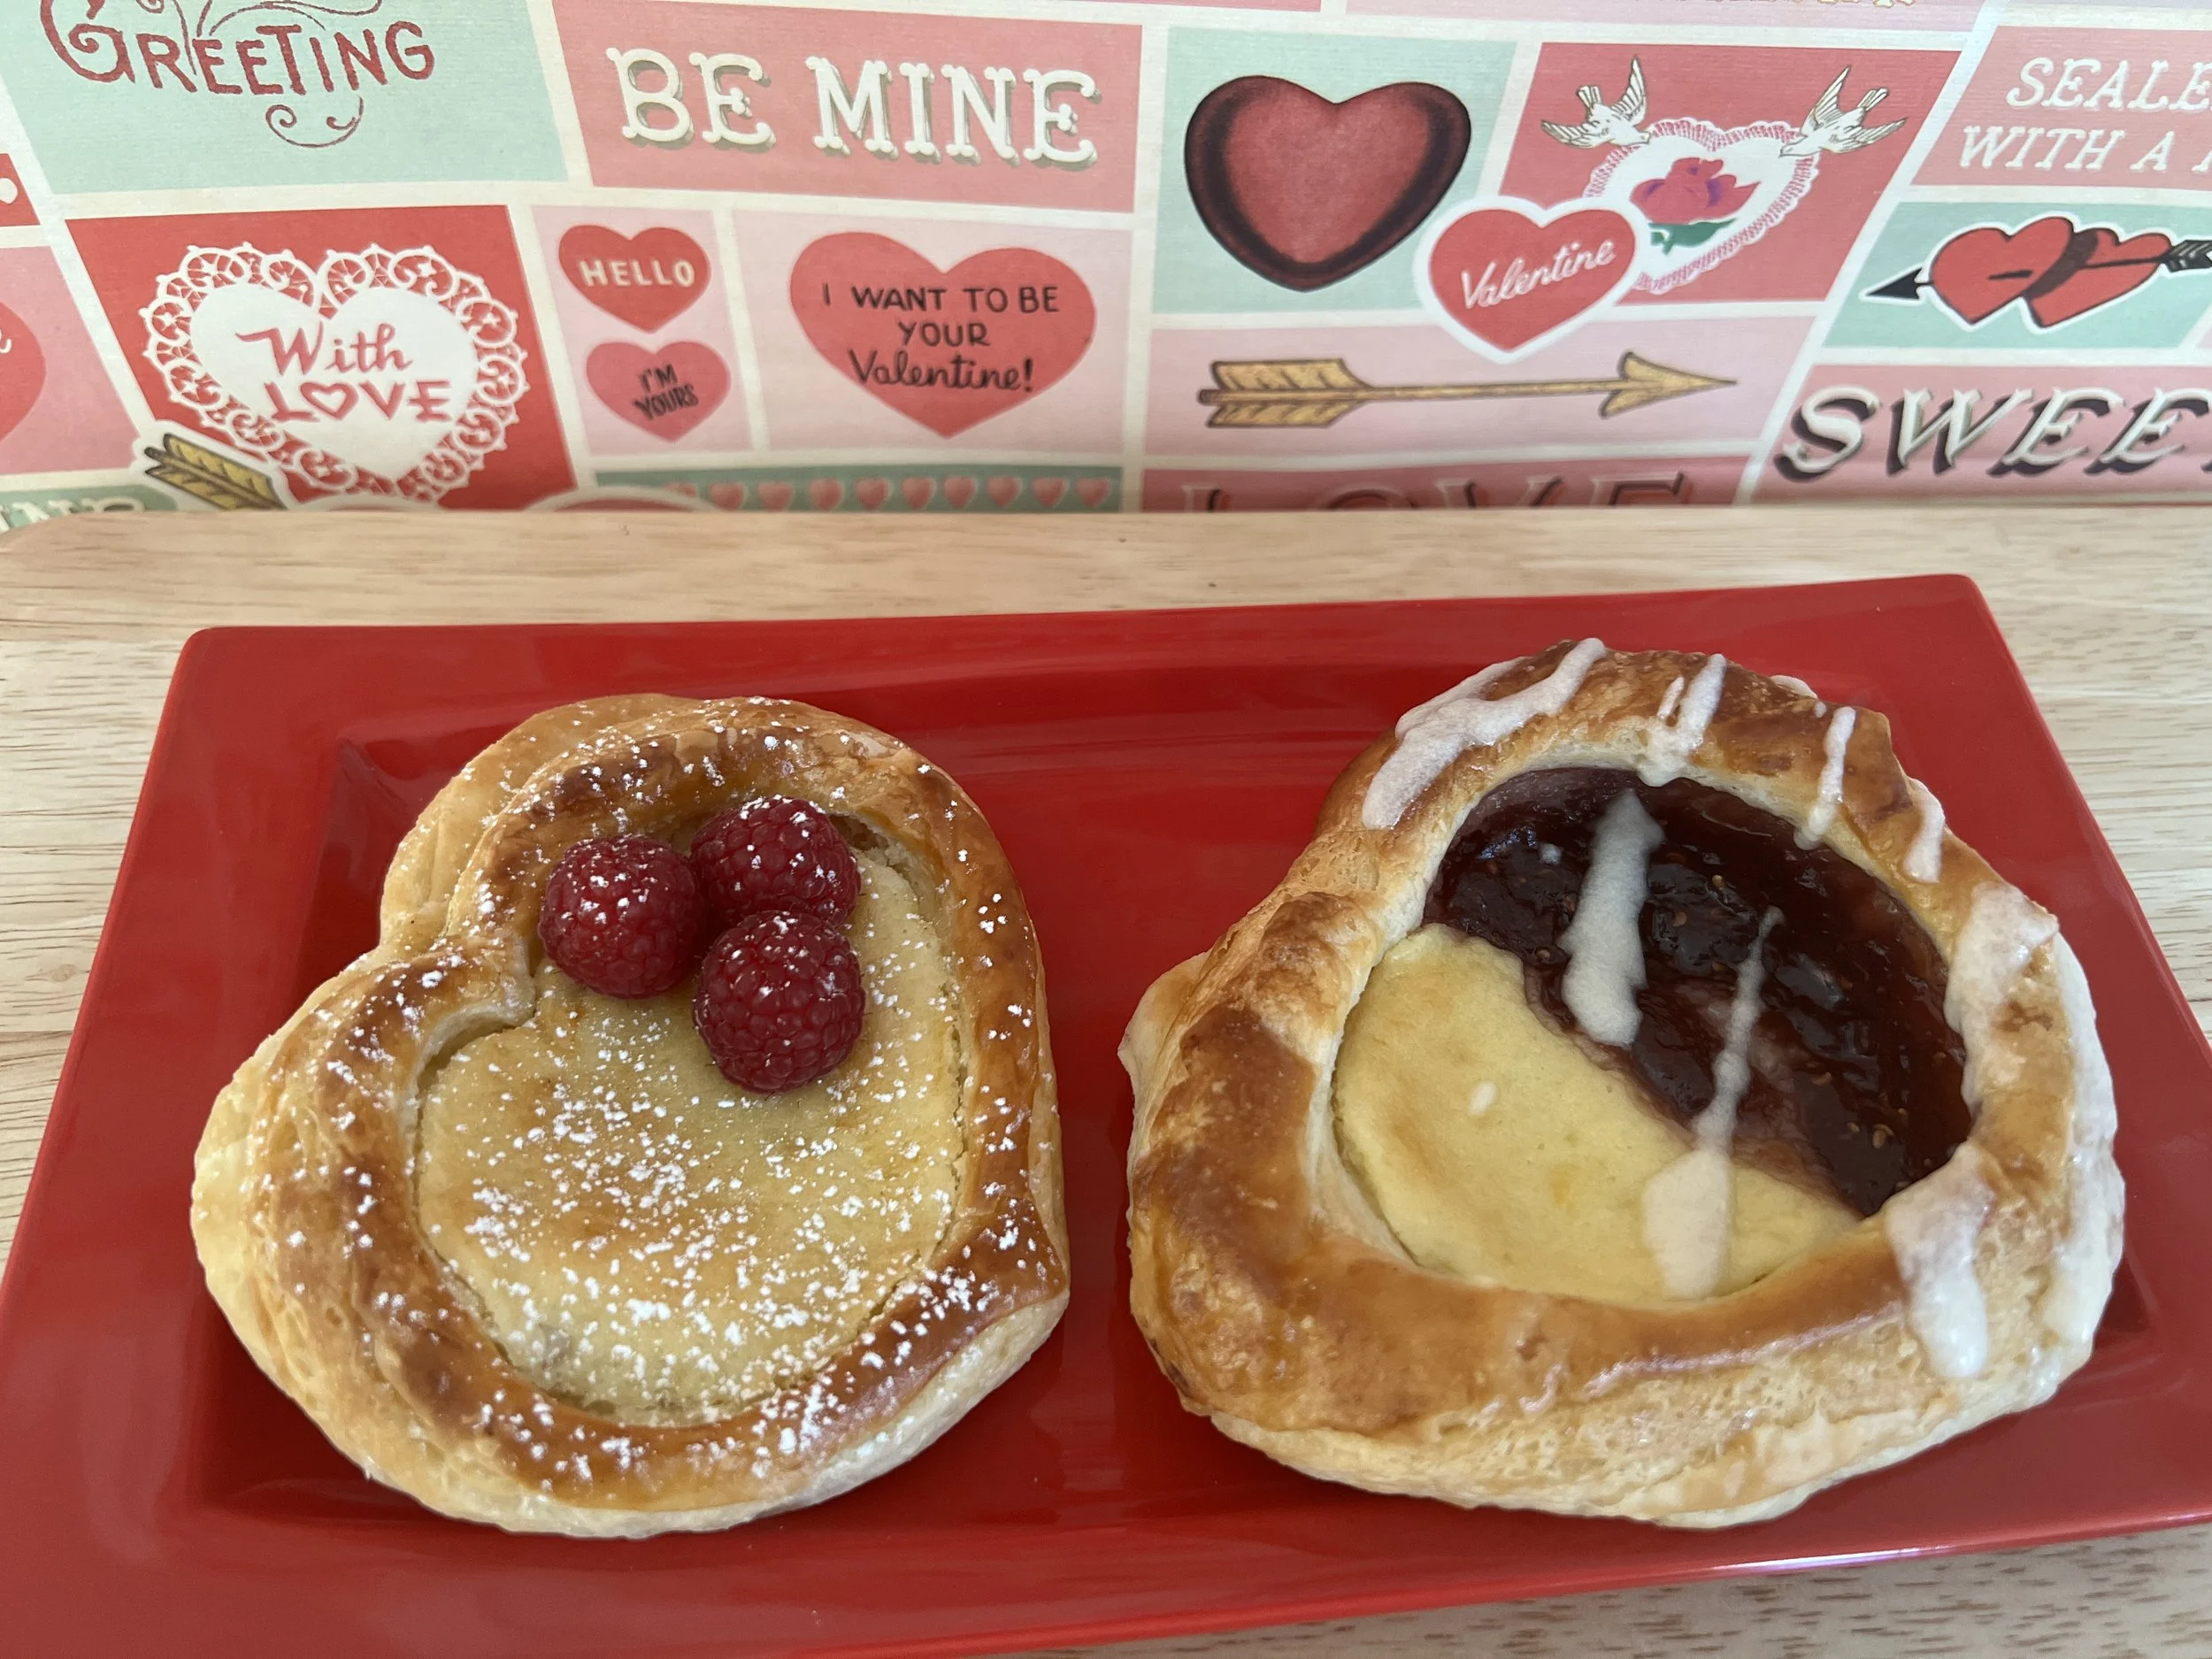
Once you are ready to shape and bake the croissants - it’s time to decide on how you want to fill them. If you want to make Valentine's cream cheese croissants you want to make cream cheese filling, and make sure you have raspberry jam or fresh raspberries.

If you want to make the cherry love boats - you’ll want to have cherry jam on hand or make the cherry filling below. And if this looks familiar I am recycling the recipes from the cherry hand pies Live class from 2/3 - they were just that good.

If you would like to see that Craftsy live - it is streaming on Craftsy and here is the link:

Craftsy Live - Cherry Hand Pies

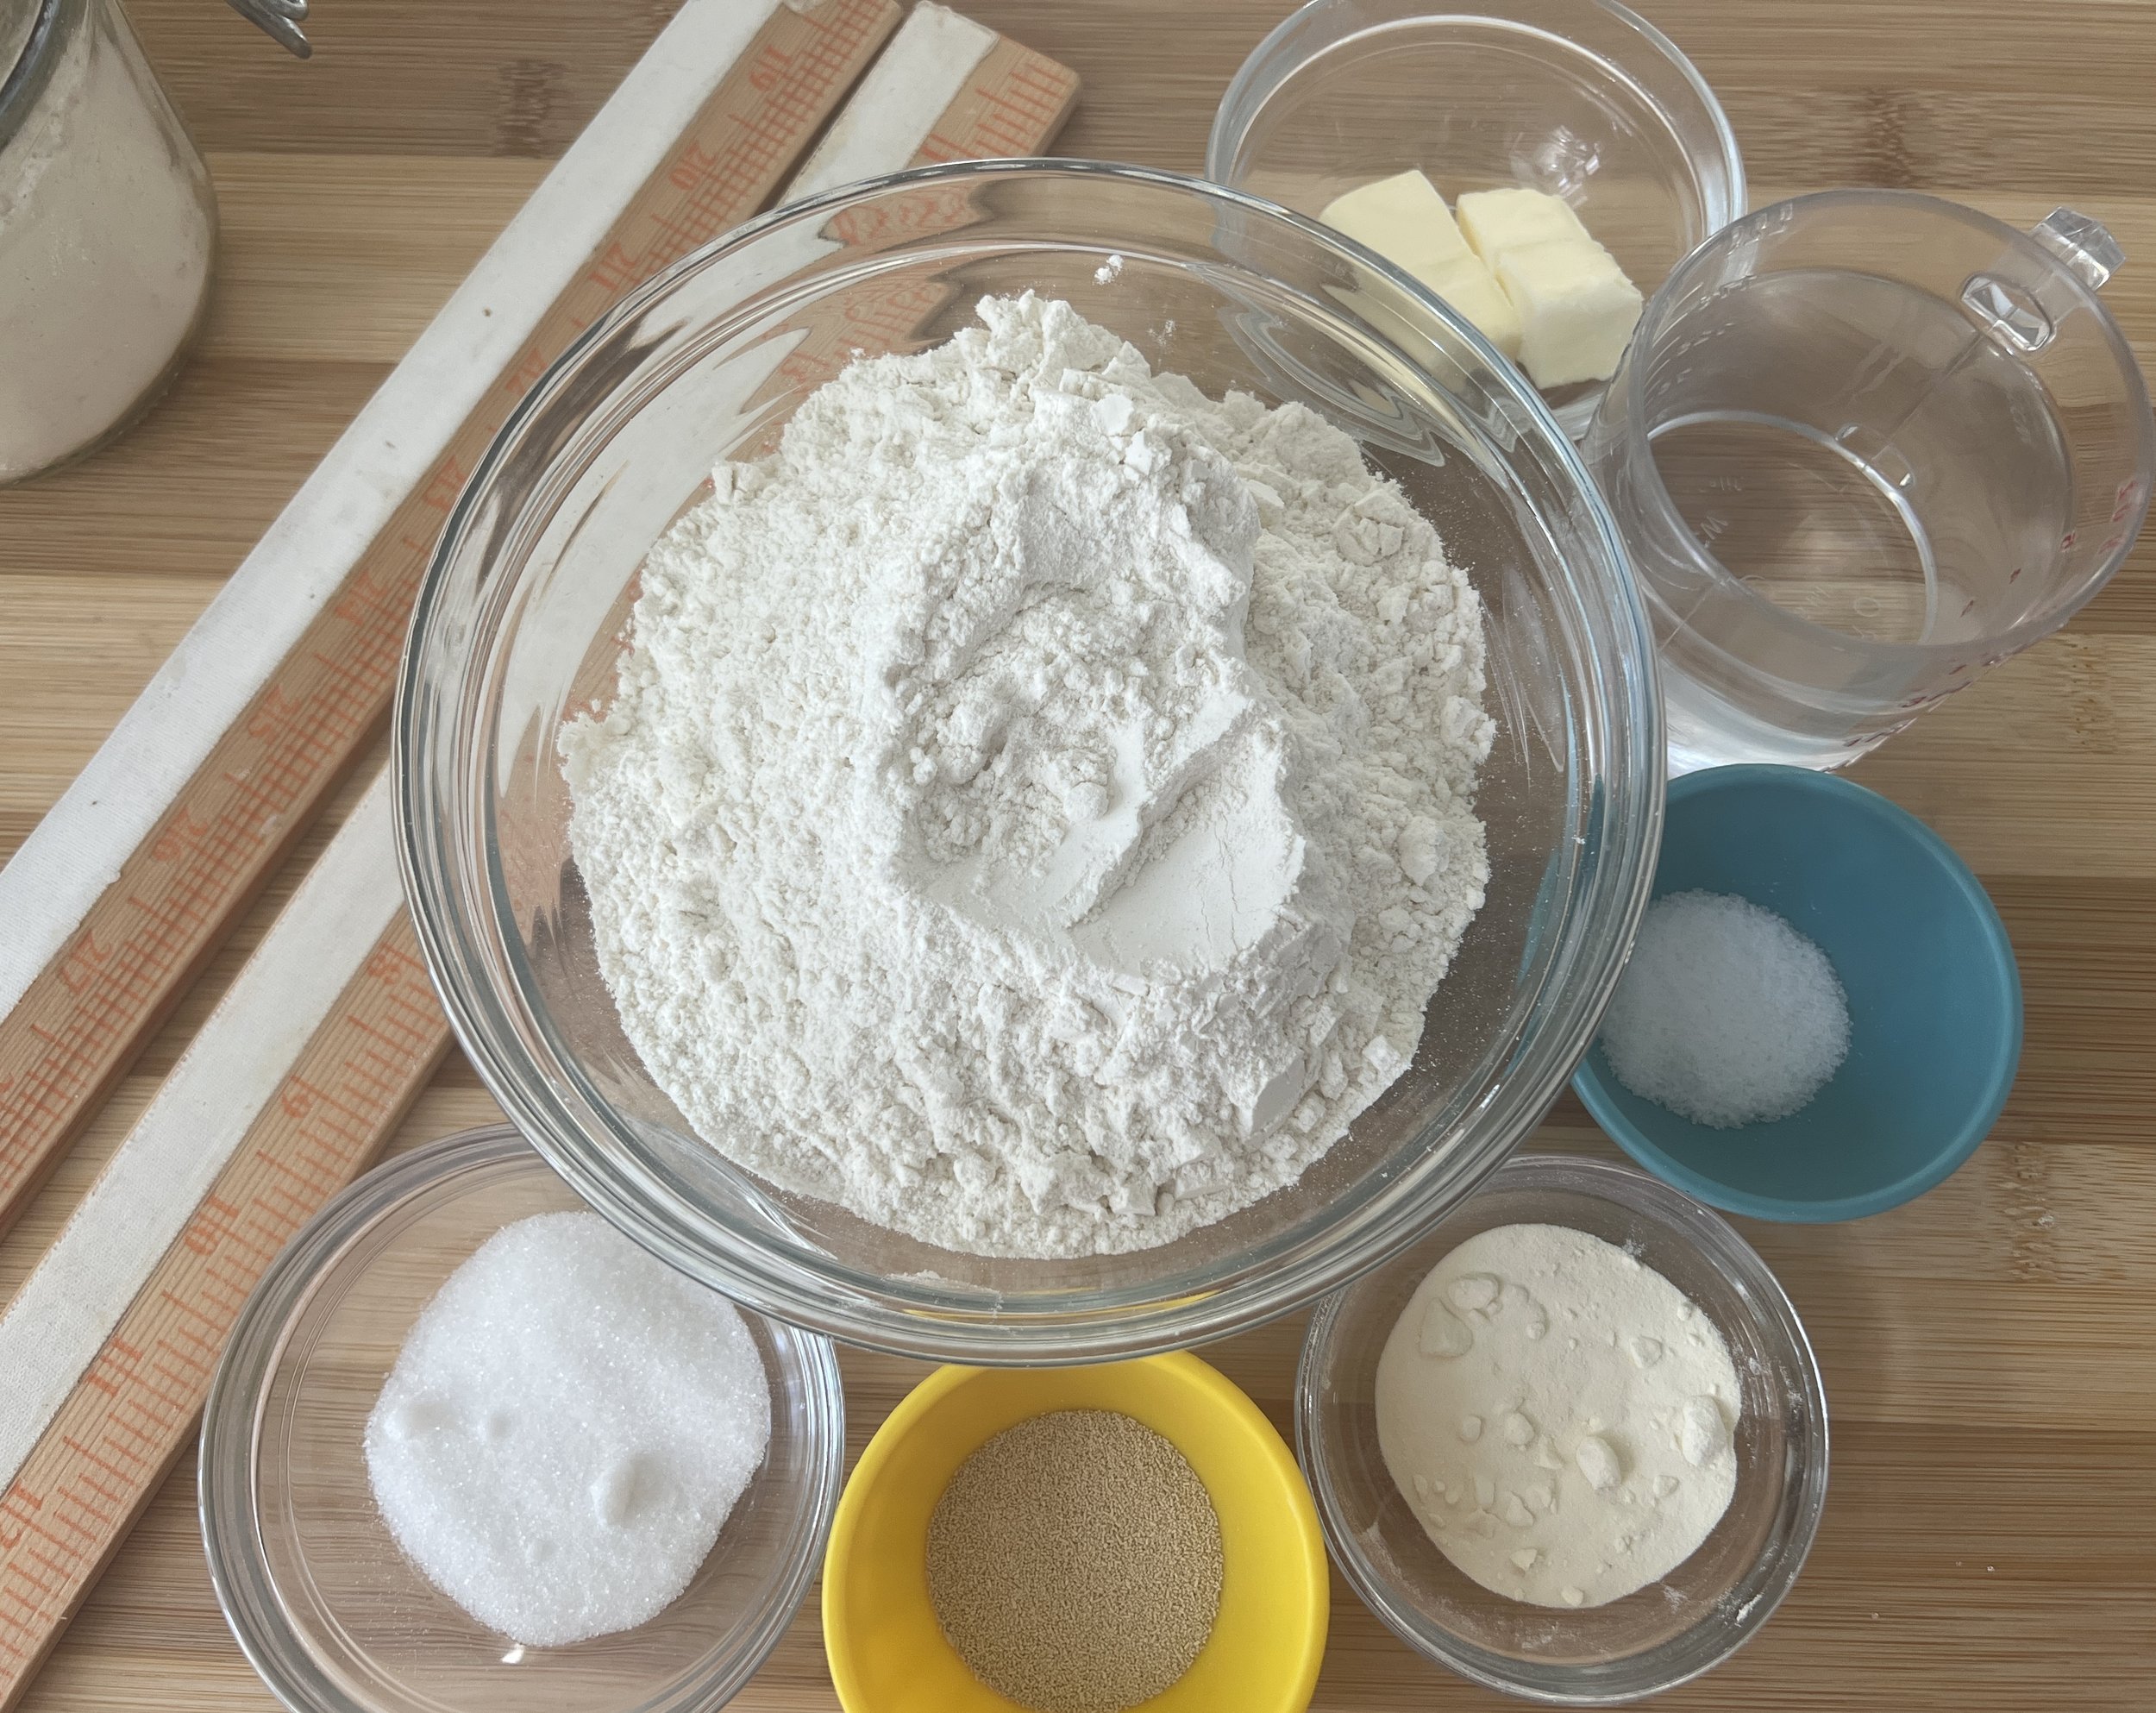
Cream Cheese Filling - this can be doubled

113g cream cheese

  28g butter, softened

  57g sugar

  25g egg (½ egg)

    4g vanilla extract

  12g all purpose flour

     ½ lemon zested

  1. In a mixer fitted with the paddle attachment, combine cream cheese and butter. Mix on medium speed for about 2 minutes until smooth.

  2. Add sugar, mix until combined.

  3. Add egg, vanilla extract, bread flour and optional zest.

  4. Mix for 2 minutes on medium speed until smooth.

  5. Keep for 1 week, refrigerated.

Cherry Filling

This recipe can be doubled

½ bag frozen cherries (5 ounces)

12g sugar (sugar 1#)

25g sugar (sugar 2#)

15g (1 Tablespoon) instant clear gel

½ teaspoon almond extract

½ vanilla extract

Where to buy Instant Clear Gel: Instant Clear Gel

1. Place the cherries in a medium sized bowl and sprinkle the sugar on top of them.
2. Let them sit for 20 minutes so that the sugar can draw out more moisture from the cherries.
3. Combine the instant clear gel with the remaining sugar (sugar #2) and stir into the cherry mixture. Let the filling thicken at room temperature for 20 minutes.
Refrigerate until ready to use. 

Egg wash

1 egg beaten with a good pinch (⅛ teas) salt

Beaten until smooth and then strain

Keeps for 24 hours in the refrigerator

Rolling out dough

Proofed Valentine’s croissants - unfilled

  1. Line a baking tray with parchment paper.

  2. Roll the dough out to ⅛ of an inch.

  3. Cut large hearts or 4” squares. Move to the baking tray.

  4. Cut the heart border and brush base with egg wash.

  5. Place on the heart base and fill with cream cheese/jam or however you like.

  6. Cover and proof overnight in the refrigerator.

  7. In the morning, remove croissants from the refrigerator, preheat the oven to 375. Brush the tops of the croissants with egg wash. 

  8. Bake for 25-30 minutes in the middle of the oven until they are a beautiful golden brown.

    Cherry Love Boats

Cherry Love Boats

1. Cut dough into 4” squares.
2. Pick up the corners of the dough and seal them together for an inch. They should look like little gondolas. Proof and egg wash. Bake until golden brown. And if stripe with almond flat icing.

Almond Icing
Ingredients
85g Powdered Sugar
19g Butter
2g (1/4 teas) Almond Extract
4g (1/2 teas)Vanilla

  1. Combine powdered sugar, milk, butter and vanilla extract in a medium sized bowl and whisk to combine.
    Leftover icing will keep for 5 days in the refrigerator.
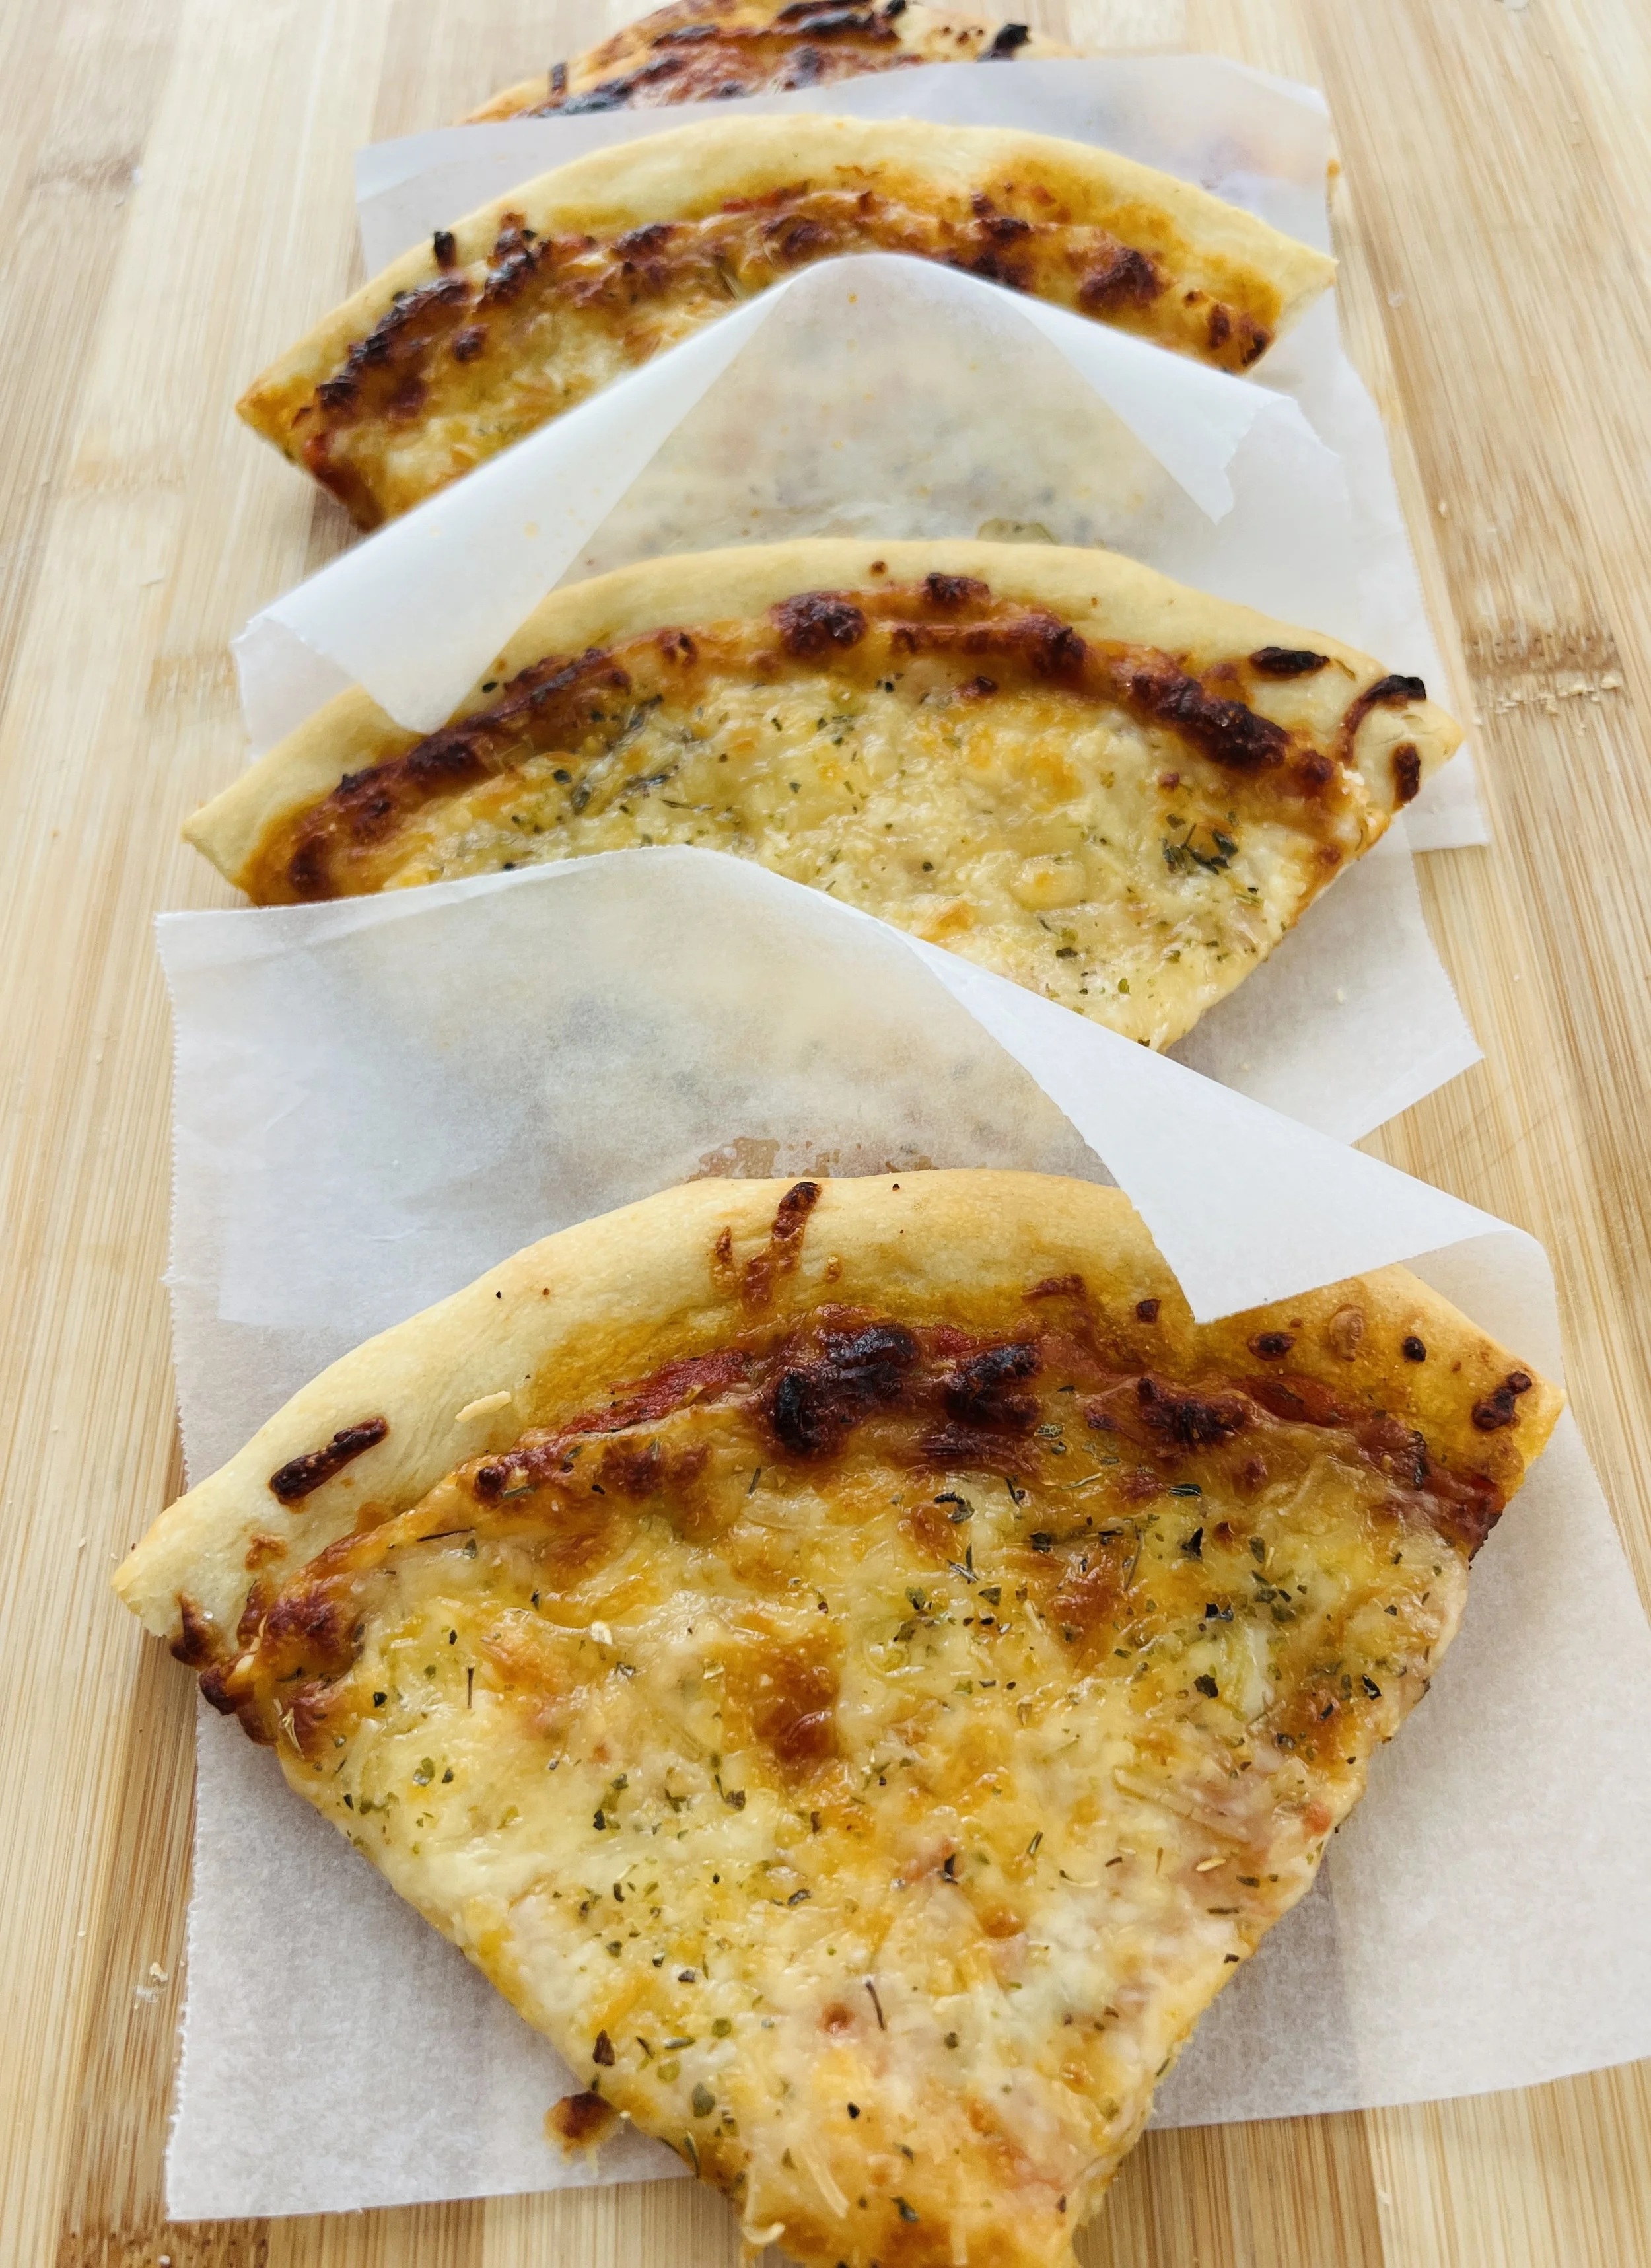
Pain au chocolat

  1. Cut dough into 4” squares. 

  2. Stretch gently into a rectangle.

  3. Egg wash the center of the square.

  4. Place two rows of chocolate chips alongside each side of the egg wash and fold edges to the center. Press lightly to seal.

  5. Flip over and place on the prepared baking tray.

  6. Cover and proof overnight in the refrigerator or for an hour at room temperature, until they look like they have expanded about 1/3rd of their pre proofed size.

  7. Egg wash. 

  8. Bake for 25 - 30 minutes at 375.

    Lately, I have been using the scraps to make really delicious rolls - they are not perfectly shaped - but once proofed, egg wash and baked. And as an option, it gives my brioche molds a workout.

    Here is a short video showing how to make them.


Comment

Croissant - Small batch for Valentine's Day - The DoughDr Episode 2/4/2023

February 06, 2023

Hello Bakers,

Croissant dough is 62% hydration. On Saturday’s show I demoed a small batch croissant dough that we are are turning into delicious croissants for Valentine’s Day breakfast - the way I am setting this up is by having you proof the croissants overnight in the refrigerator then egg wash and bake the next morning.

For this week were are making the dough and it’s a fast business. Not time in between turns unless you feel the dough warm up. I was able to complete all three turns right in front of all of you on Saturday. Here is the link to the show: Saturday's Show The point of this exercise is one to experience a 62% hydrated dough - the pizza from last week was 65% so this will feel a little different. We are also going to laminate and freeze the dough. Next week will shape it for Valentine’s day.
Ok get ready - this won’t take long - if you want a long croissant making demo with lots of explanation please check out my Craftsy class: Classic Croissants, Modern Techniques - here is the link: Craftsy Croissant Class

Enough talk - here is the recipe. Please message me with questions and I would love to see photos of your dough as well.
Happy Baking!

Colette

Equipment:

Equipment: Scale, stand mixer, dough hook or large bowl and bowl scraper, 1 quart size zip-top bag or parchment paper, rolling pin, dry brush, ruler, plastic wrap, gallon size ziploc bag for freezing.

Ingredients:

175g milk - can be whole, 2%, plant based or water and dry milk powder can be used (175g of water to 12g non fat milk powder) (75- 80 degrees)
5g yeast - instant preferable but active dry will work - use 7g if using active dry10 oz. (283g) all-purpose flour, unbleached (100%)
22g sugar
14g unsalted butter softened
7g salt

Butter block 198g (7 ounces) unsalted butter

Small Batch Croissant MEP

  1. In the bowl of the stand mix, combine the milk and yeast - let sit 5 minutes.

  2. Add the flour, sugar, butter and salt.

  3. Mix on speed 2 for 2 minutes or until the dough clears the side of the bowl and becomes a cohesive mass.

  4. Reduce the speed to low and let mix 1 minute. Total mixing time for croissant dough is 3 minutes as we continue to develop gluten as we roll and fold our dough (laminate).

  5. Place the dough in a buttered bowl, cover with plastic wrap and let sit at room temperature for 60 minutes. In the meanwhile, make and refrigerate the butter block.

    Butter Block

    1. Cut each stick of butter - it should be right out of the refrigerator into thirds lengthwise, place in ziploc bag, side by side into 2 rows and then gently tap and roll to fill the bag. Leave about an inch at the top free and do not seal the bag until the butter block is formed. Refrigerate.

    2. After the dough has sat for an hour, refrigerate for 2 hours. Then begin shaping. Remove butter block from refrigerator. The butter block is the correct temperature for laminating when you can roll it on the edge of the counter and it does not crack.

    3. Roll the dough out into a rectangle that is 2x as long and the same width as the butter.

    4. fold the unbuttered side over the buttered side - the butter layer should be visible around the edge. Give the dough a 1/4 turn roll out to 8” tall by about 15” long - it should be 1/4” thick and fold into thirds. Repeat the process 2x more times. If the dough warms up and the butter feels like it is softening - then chill the dough for 25 minutes and then roll out again.

    5. Once all three turns are completed, wrap the dough in plastic wrap, slip it into a Ziploc bag, label and date and freeze until next week.

The dough and the butter block - ready to roll

1 Comment

Pizza Dough! The DoughDr Episode 1/28/23

January 30, 2023

Hello Bakers

There is so much to say about the benefits of making our own pizza dough - but I will keep it brief because I want you to experience the satisfaction of making your own dough and crafting your own pizzas.

This can be done easily with basic baking equipment. Should you want to level up your pizza making equipment - I have suggestions for you below.
We are at 65% hydration which means this dough is going to be stickier than last week’s breadsticks. In the show I demoed mixing the dough by hand but use the mixer is you have one - the method for both is below. Here is the link to the show: Saturday's show

If any questions come up for you - please message me here or on Instagram @bakingwcolette. And please tag me in your bakes as it makes me so happy to see your beautiful work.

Happy Baking! Colette

Pizza Dough Mise en place

400g bread flour (100%)
260g water - 80 degrees (65%)
5g yeast (1.25%)
18g olive oil (4.5%)
7g salt (1.8%)
Total dough weight: 690g 
Yield: 3 8 ounce pizza crusts

Basic Equipment: Oven, Scale, Large mixing bowl, bowl scraper, pastry brush, dough storage container, plastic wrap or lid.

Next level: Pizza stone, Stand Mixer with dough hook attachment, pizza pans or screens, pizza   peel, parchment paper.

Getting Started: 

1. Gather your equipment and Ingredients

2. Mix dough and set up for bulk fermentation

3. After one hour, degass dough, shape into 227g balls and refrigerate overnight.

4. Prepare toppings - cool any cooked toppings to room temperature and drain any excess liquid from juicy toppings like mushrooms.

5. Preheat the oven.

6. Assemble pizzas - bake and enjoy! 

Making the dough:

In a large mixing bowl or in the bowl of your stand mixer, fitted with the dough hook, combine the water and the yeast, stir for 10 seconds and let sit for 5 minutes.

Add the olive oil, flour and salt.

If mixing by hand - use the dough scraper to incorporate the liquid and flour mixture, work quickly and deliberately - we are looking for it to become a shaggy cohesive mass within a few minutes. Once it clears the side of the bowl - dust your work surface, lightly, with flour and then dump out the dough - it will be sticky - lightly flour your hands ***key word is lightly,  and knead until the dough is smooth - use your bowl scraper if it becomes too sticky to handle.

***Adding too much flour will make the dough heavy and the finished crust chewy and tight.

Knead for a few minutes until smooth. Return to the well scraped mixing bowl or a clean one that has been lightly greased with olive oil, cover and let sit at room temperature for one hour.

In the mixer - mixing on speed 2 for 2 minutes, then reduce speed to low and mix for an additional minute - please use your timer. Optional - mixing - dump the dough out onto your work surface and knead - for 30 seconds - return to mixer bowl, cover and let sit at room temperature for one hour.

After one hour, gently press the gas out of the dough, divide into 227g (8 ounce balls) place in oil coated container, flip the balls over to coat the tops, cover and refrigerate overnight. At this point the dough can also be frozen for up to one month. Place balls of dough, individually in Zip Loc bags, label and date.

Dough Balls

Preheat the oven to 450 degrees , 425 if your oven has a convection setting. If you are using a pizza peel make sure that it preheats for at least 30 minutes.

If using a pizza pan, sheet - pan or screen brush well with olive oil. Optional: dust the pan with corn meal or semolina. If you want to bake the pizza right on the pizza stone shape on a square of parchment paper that has been lightly oiled.

Roll or stretch the dough into a 10-11” circle. Spread with sauce and top with desired toppings.

Dough rolled out on parchment - you can also use a pizza pan, sheet pan or pizza screen

Make sure that any cooked vegetables are well drained and that the pizza is not too heavily sauced - that can make the dough underneath soggy.

Bake for 12 - 14 minutes until the crust is golden brown. Brush the crust with olive oil for some extra shine


Comment

Cinnamon Sugar Breadsticks

Breadsticks - Sweet or Savory - The DoughDr Episode from 1/21/23

January 23, 2023

Hello Bakers!

Here is the recipe to match Saturday’s demo - Stuffed Breadsticks. The link to Saturday's show

We are focusing on bread, working from low hydrated doughs to more hydrated ones. Last week it was the lowest hydrated dough, bagels. They easy to handle, mix, shape and bake and I hope that you get a chance to bake a batch.
This week we are moving up 2% in hydration - the ratio of liquid to flour in a yeast dough - and making breadsticks.
Once mastered, these breadsticks are completely customizable. They can be made sweet or savory - there are so many possibilities. I will make a few suggestions at the end of the post but I know you are creative and you will come up with some amazing stuffed breadsticks. Please tag me in those photos - I love to see your beautiful work.
Enjoy your baking!
Colette

Breadsticks - Mise en Place - so many possibilities

Breadsticks - can be Savory or Sweet

Equipment: Stand mixer fitted with the dough hook, scale, bowl scraper, parchment paper, rolling pin, ruler, spatula

230g water 80 degrees
7g yeast
400g Flour
12g Vegetable oil or Olive oil
21g butter, softened
12g sugar
8g Salt

For savory breadsticks: 1-2 ounces olive oil
For sweet breadsticks: 1-2 ounces melted butter

The dough ready for bulk fermentation

  1. Combine the water and yeast in the bowl of a stand mixer fitted with the dough hook. 

  2. Stir to combine.

  3. Let sit for 5 minutes.

  4. Add oil, flour, sugar, butter and salt.

  5. Mix on speed 2 for 2 minutes and then on speed 1 for 2 minutes.

  6. The dough can stay in the mixer bowl to bulk ferment or it can be transferred to a lightly oiled or buttered bowl. Cover the top of the bowl with plastic wrap.

  7. Bulk ferment - let rise until doubled in volume for 60-90 minutes.

  8. Remove dough from bowl.

  9. Roll the dough out to a 10”x14” rectangle onto a piece of parchment paper.

  10. Make sure the corners are squared off and the sides are straight.

  11. Spread filling on 2/3rds of the dough all the way to the short and long side.

  12. Fold the plain (unfilled) top (long edge) of the dough on top of the filling.

  13. Fold the filled edge over the filling. Use the parchment paper to help fold.

  14. Remove the parchment paper. Cover the dough with plastic wrap and let sit for 5-7 minutes so that the gluten relaxes.

  15. Roll the dough so that it measures 6” x 14”.

  16. Using a ruler, mark 1” increments.

  17. Using a pizza wheel to cut 1” strips.

  18. Twist the sticks and place on the prepared pan.

  19. Cover and let proof for 30 minutes. Preheat the oven to 375 degrees.

  20. Mist with water, lightly, before baking.

  21. Bake for 25 -30 minutes or until they are a deep golden brown.

  22. Brush with olive oil or melted butter as soon as they come out of the oven. 

Once you master the techniques - here are some flavor combinations:
Savory: Pesto, olive tapenade, roasted garlic paste and asiago cheese
Sweet: Nutella and finely chopped toasted hazelnuts, Biscoff Spread and crushed Biscoff cookies, chocolate babka filling and streusel.


Comment
Newer / Older
Back to Top

email: bakingwithcolette@gmail.com