
Hello Bakers,
I am eight weeks into hip replacement recovery and it is going well. I am now walking pretty much on my own. Getting around the kitchen is not nearly difficult as it was when I wrote my last post. However, physical therapy has taken up a lot of time so I apologize for not having a chance to write until now.
In this post, I am going to show you a delicious quick puff pastry - it is easy and quick. Then we will use it to make peach turnovers. The peaches have been especially good this summer. Cherries have been delicious too.
The dough can be used for any recipe that has uses puff pastry. This is another excellent Albert Kumin recipe that I have adapted. Blitz puff is a great dough to master. It does not need a long rest, the turns are all done at once and it is a good stand in for most puff pastry projects. It is especially good for turnovers like these, galettes, fruit bands, and cheese straws.
Happy Baking! Colette
Blitz Puff Pastry
Yield: 20 ounces of dough - yield 9 turnovers
Equipment: Stand mixer fitted with the paddle attachment, bowl scraper, rolling pin, dry pastry brush.
8 ounces (227g) Unbleached all purpose flour
1/2 ounce (15g) Granulated sugar
7g Fine sea salt (scant teaspoon)
8 ounces (227g) Cold Butter, cut into 1” pieces
4 ounces (113g) Very cold water - I make a batch of ice water and the measure off the 4 ounces (113g) from that ice water.

Blitz Puff Pastry Mise en Place
Place flour, sugar, salt and butter in the mixer.

Scatter butter on top of the flour, sugar and salt.
Turn the mixer off and on (pulse) until the butter is about the size of big corn flakes - the butter pieces should be visible.

This is how the butter should look.
Add cold water and mix turning the mixer off and on until the dough just comes together.

Stop mixing when the dough comes together
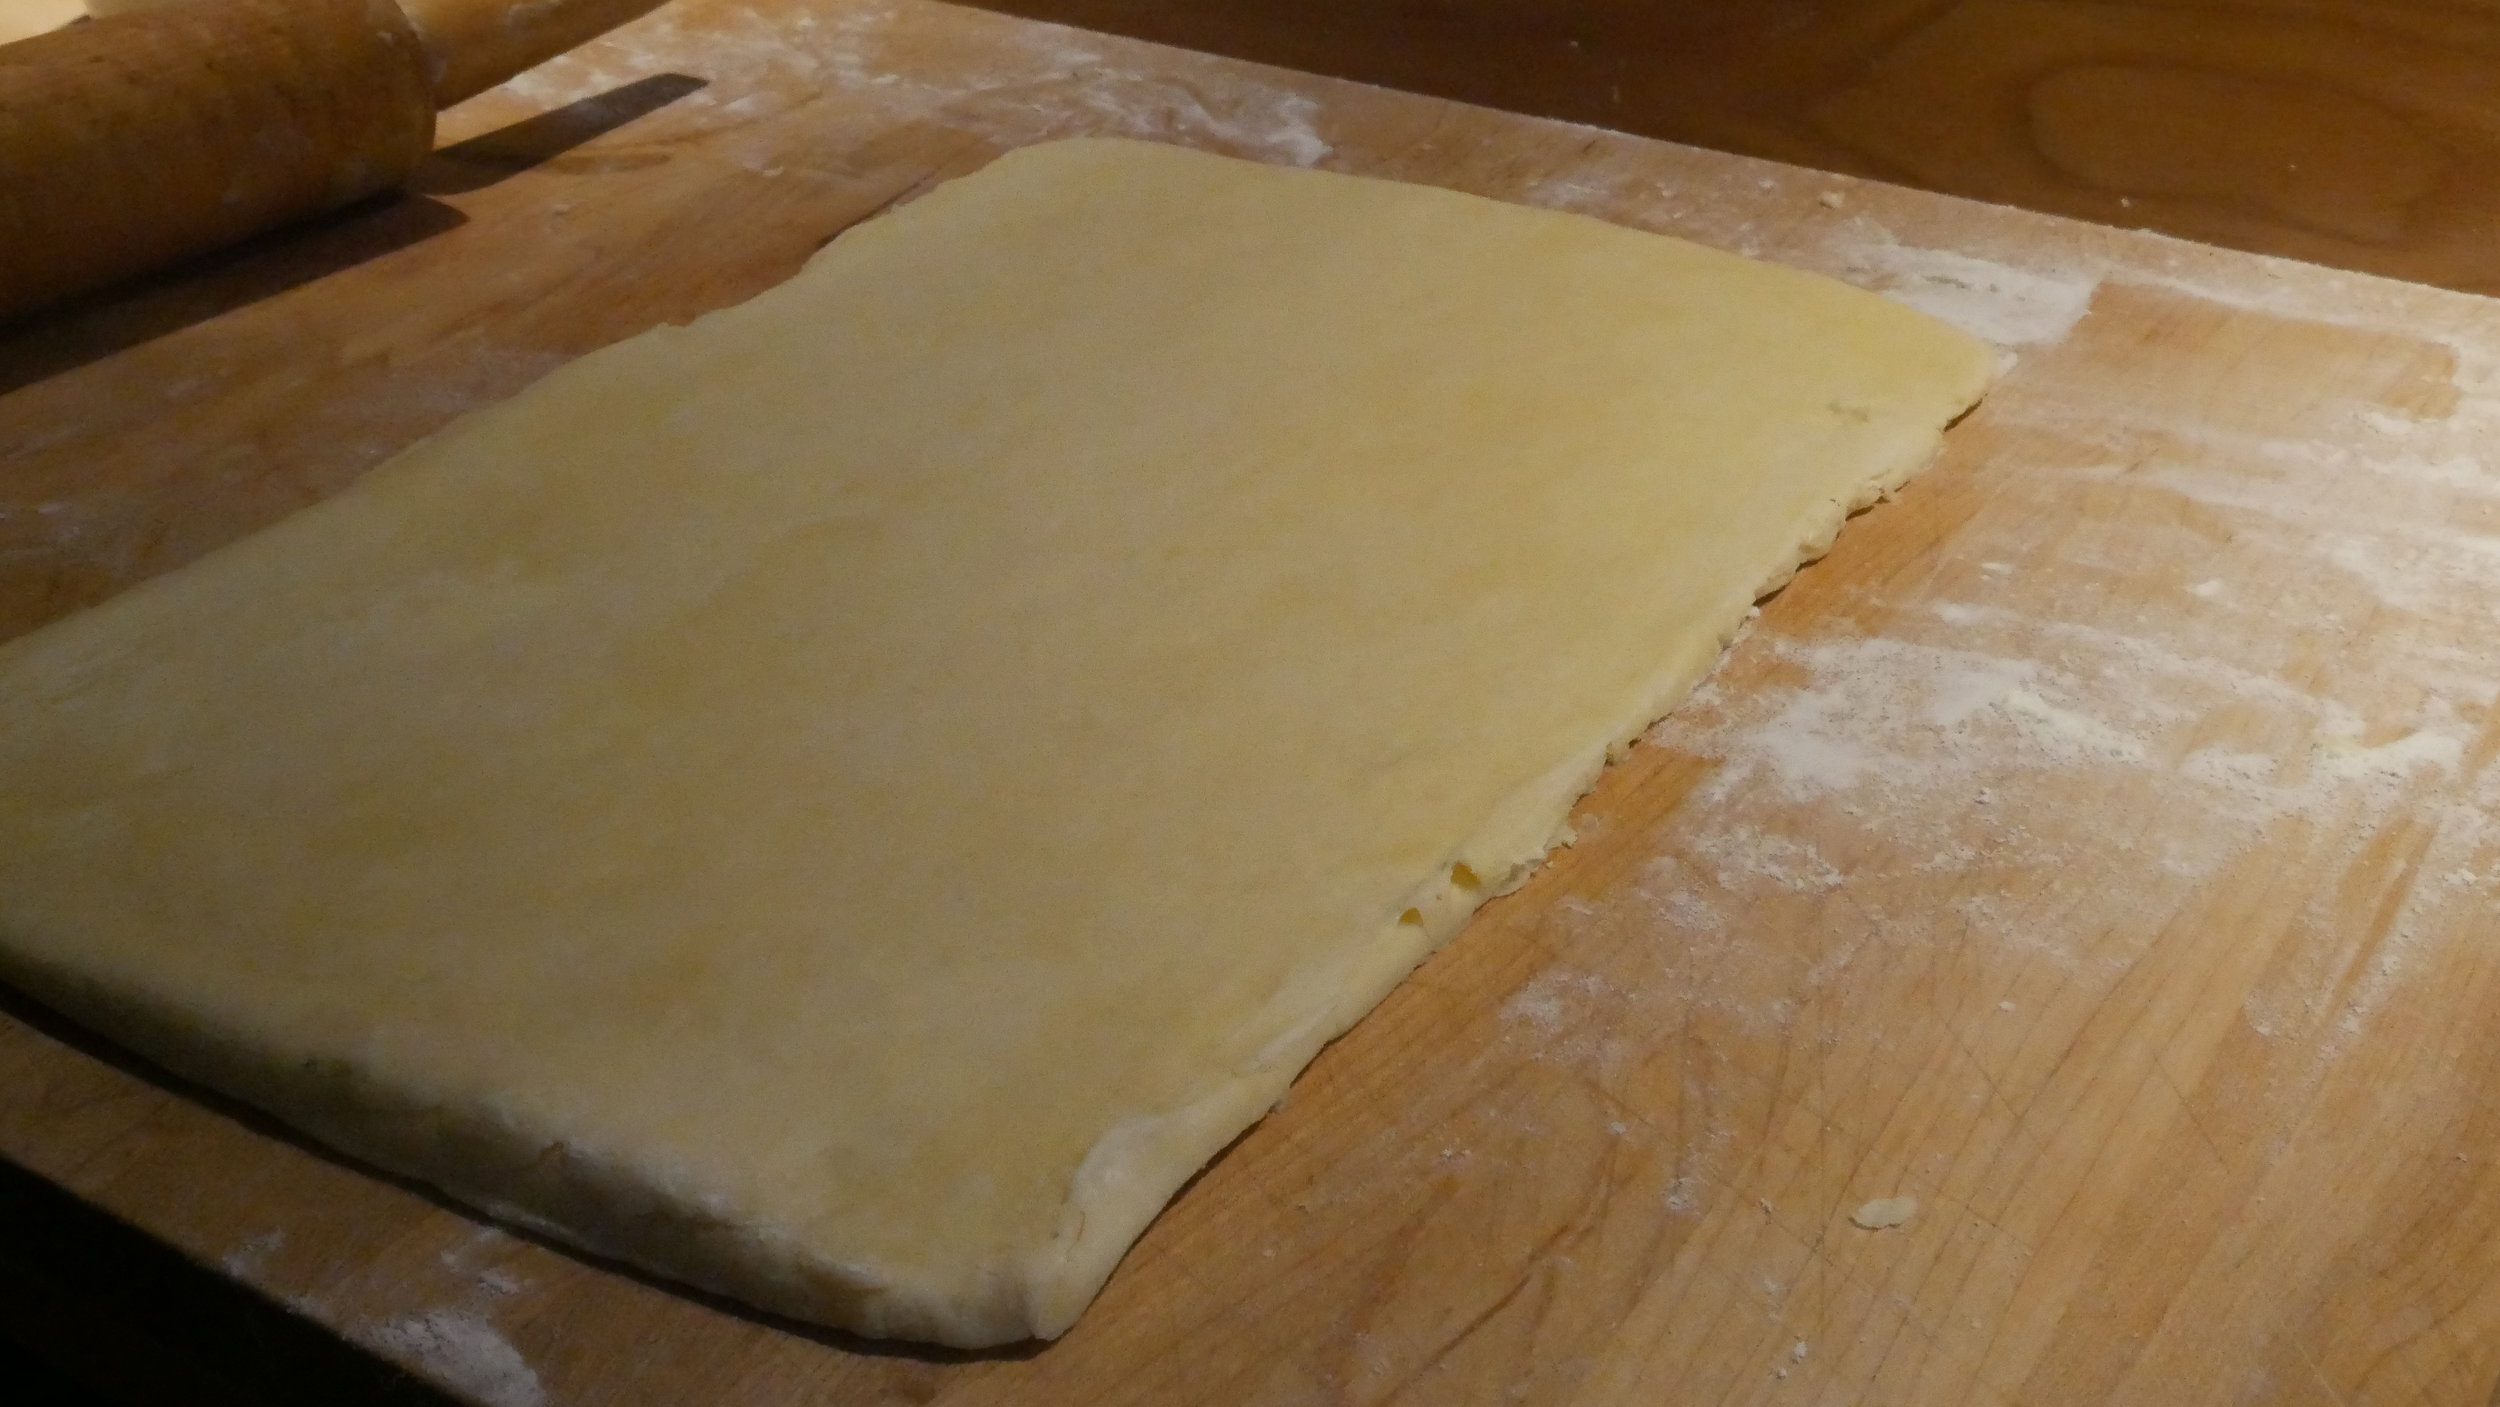
Dump the dough onto a lightly floured work surface, roll out to 14" x 8" give 1 book fold, then roll out to 14" x 8", give a single fold, and then roll out, for a last time to 14" x 8" and finish with one more book fold.

The dough on the work surface.

Roll out to 14" x 8" - the rough edges are ok.

First book fold...

Finished first book fold

Immediately roll out again to 14" x 8" - make sure that the dough isn't sticking.

Second fold is a envelope (aka a tri fold or single fold)
Roll out again to 14" x 8" - you can see how the dough changes and smoothes out.

Final book fold - finish, wrap and chill.
Wrap in plastic wrap and chill for a minimum of 60 minutes before using. It can be frozen for up to one month at this point. If freezing, place in a freezer bag before freezing.
Peach Filling
Equipment: Medium size saucepan (this will be used twice), slotted spoon or skimmer, bowl of ice water.

Peach Filling Mise en Place
3 medium size peaches
3 1/2 ounces Sugar
2 Tablespoons Cornstarch
1/2 teas. Cinnamon
1 Tablespoon Lemon juice
pinch nutmeg
- Prepare peaches by cutting an x into the bottom of each peach.
- Carefully drop into boiling water and boil for 1 minute or until the peach skin by the cuts curls back. Sauce pan will be used again to cook filling.
- Then drop into an ice water bath.
- Peel and cut into small chunks. (About 14 ounces of prepared fruit)
- Toss the peaches, sugar, cornstarch, cinnamon, nutmeg and lemon juice.
- Dump the filling ingredients into the sauce pan and cook over medium heat, stirring until filling thickens and is no longer cloudy. Move to a bowl and let cool until room temperature. You may have a little filling left over - I tried the filling with 2 medium peaches and it was not enough.
Assembling the Turnovers:
Equipment: Rolling pin. Extra flour for dusting, pastry brush, pastry wheel, ruler, paring knife, egg wash: one egg whisked with 1 Tablespoon water or cream, sanding sugar or granulated sugar. 1 baking tray lined with parchment paper and an extra baking tray to double pan the turnovers halfway through baking. Preheat oven to 375 degrees (conventional) or 350 (convection).
1. Take the puff pastry out of the refrigerator and let sit at room temperature for 5 minutes.
2. Lightly flour your work surface. Roll out to about 15”x 15” square. Puff pastry is rolled thinner then any other dough - so the thickness is about 1/8” thick.

15" x 15" approx.
3.Cut the turner overs in 5” squares.
4. Brush the 2 bottom sides of the pastry squares with egg wash. Spoon 2 tablespoons of filling onto the pastry right below the center of the square.
5. Fold the squares over and seal with a fork. Move to parchment lined baking sheet. Trim edges with pastry wheel if they get a little distorted.
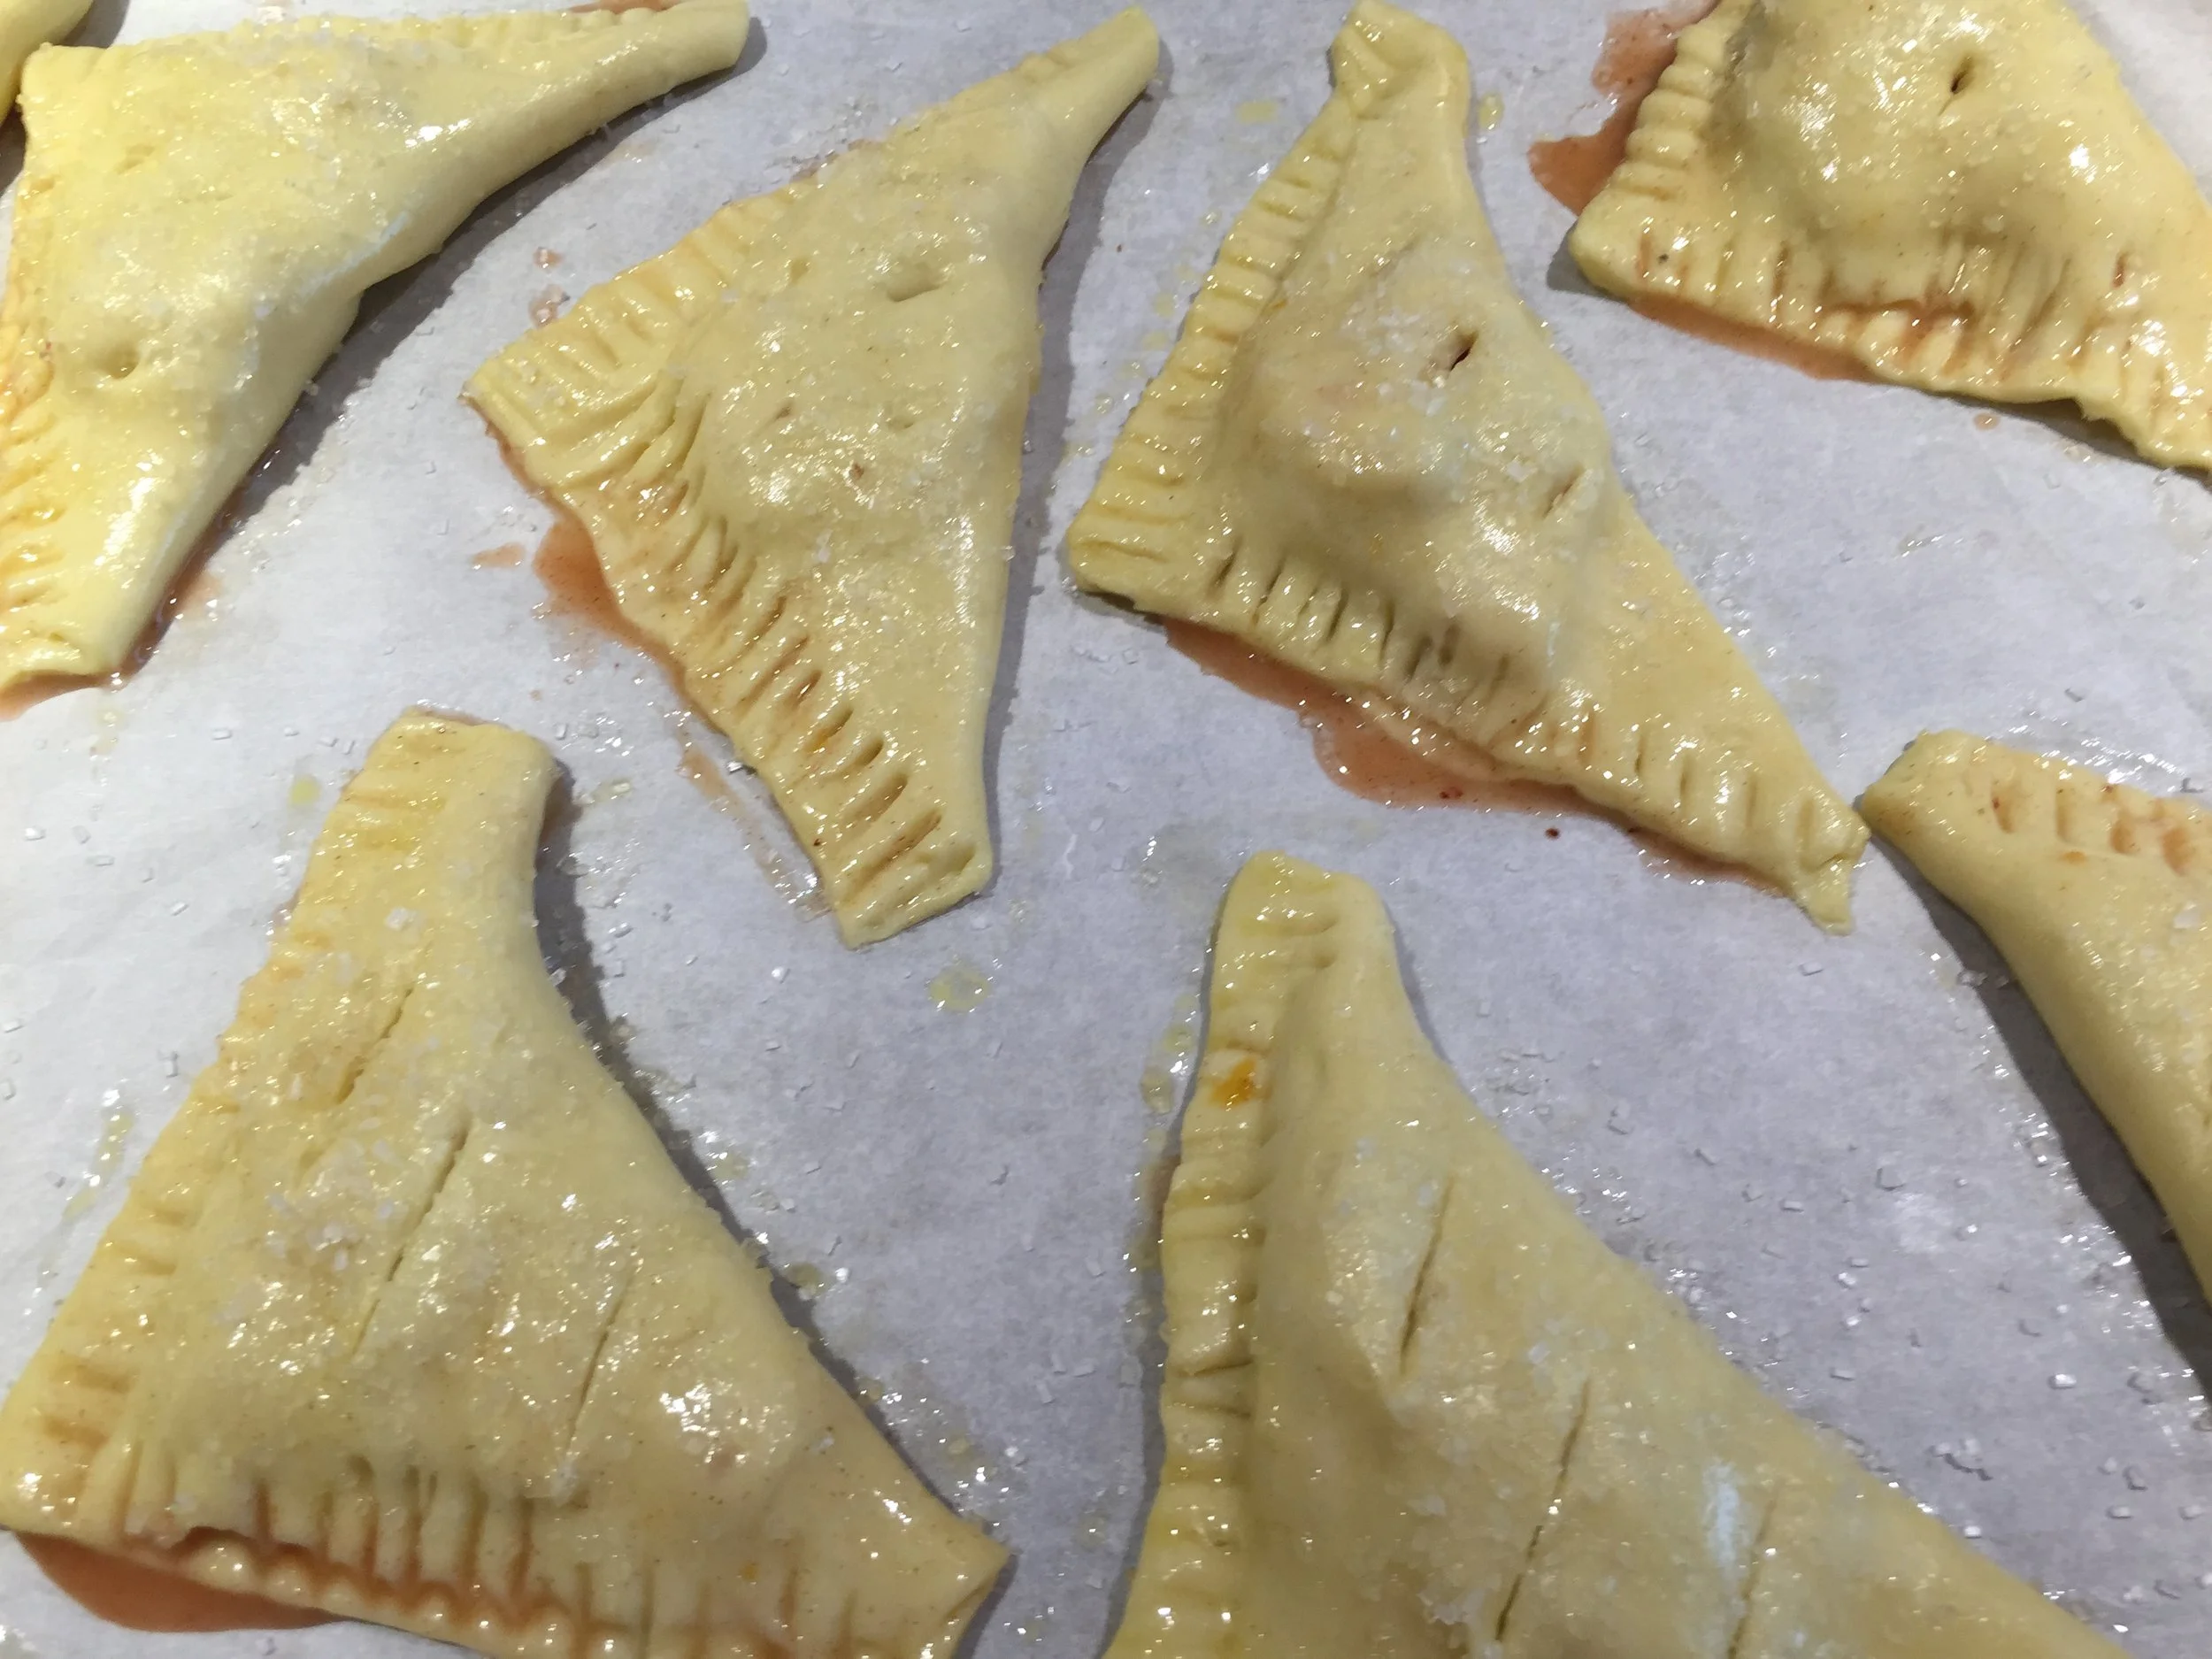
On baking tray - ready to trim and make pretty with the pastry wheel.
6. Egg wash the tops and sides of the turnovers and sprinkle with sanding sugar or granulated sugar. Use the paring knife to cut small slits in the tops.
Baking: Bake the turnovers for 15 minutes and then double pan, bake for until the turnovers a deep golden brown - that could take an additional 10-15 minutes.


