Hello Bakers,
Here is the tutorial as promised. Making a perfect pie crust can cause a lot of anxiety - the most challenging part is that the water is the variable. This means we really don't have an exact measurement of how much we need. Most of the time - when the dough is perfect - it still looks dry and we go ahead and add more water - add there is no fix for that - adding more flour just makes it worse. With all the culinary pressure Thanksgiving puts on us - you might think about reaching for those pristine frozen pie crust...it's ok bake it don't buy it. You will be happier making it yourself.
Watch the video - I will show you exactly what the dough should look like when enough water has been added.
This recipe for pie crust holds it shape. I played with the baker's percentages and it is "just right". There is nothing new about pie crust recipes - but I put a lot of thought into the ratios of fat to flour - and then I make it every day for a week until I am happy. I feel that's what being a CMB is all about.
All your hard work of getting the dough, expertly, in the pan and getting the edge fluted perfectly will not be in vain. What's the trick - part of it is in the percentage of the ingredients - there is shortening and butter - the shortening provides extra moisture and we have the flavor of the butter. There is also apple cider vinegar in the recipe - this tenderizes the gluten strands as the are developed during mixing. The acid cuts the gluten strands inhibiting their formation.
If butter and shortening need to be cold - if you remember and weigh out your shortening in advance and freeze it - that's great - but if not the recipe will still be a success.
Also, try to use unbleached flour as bleached flour tends to shrink more. it's the bleaching process tightening up the gluten strands.
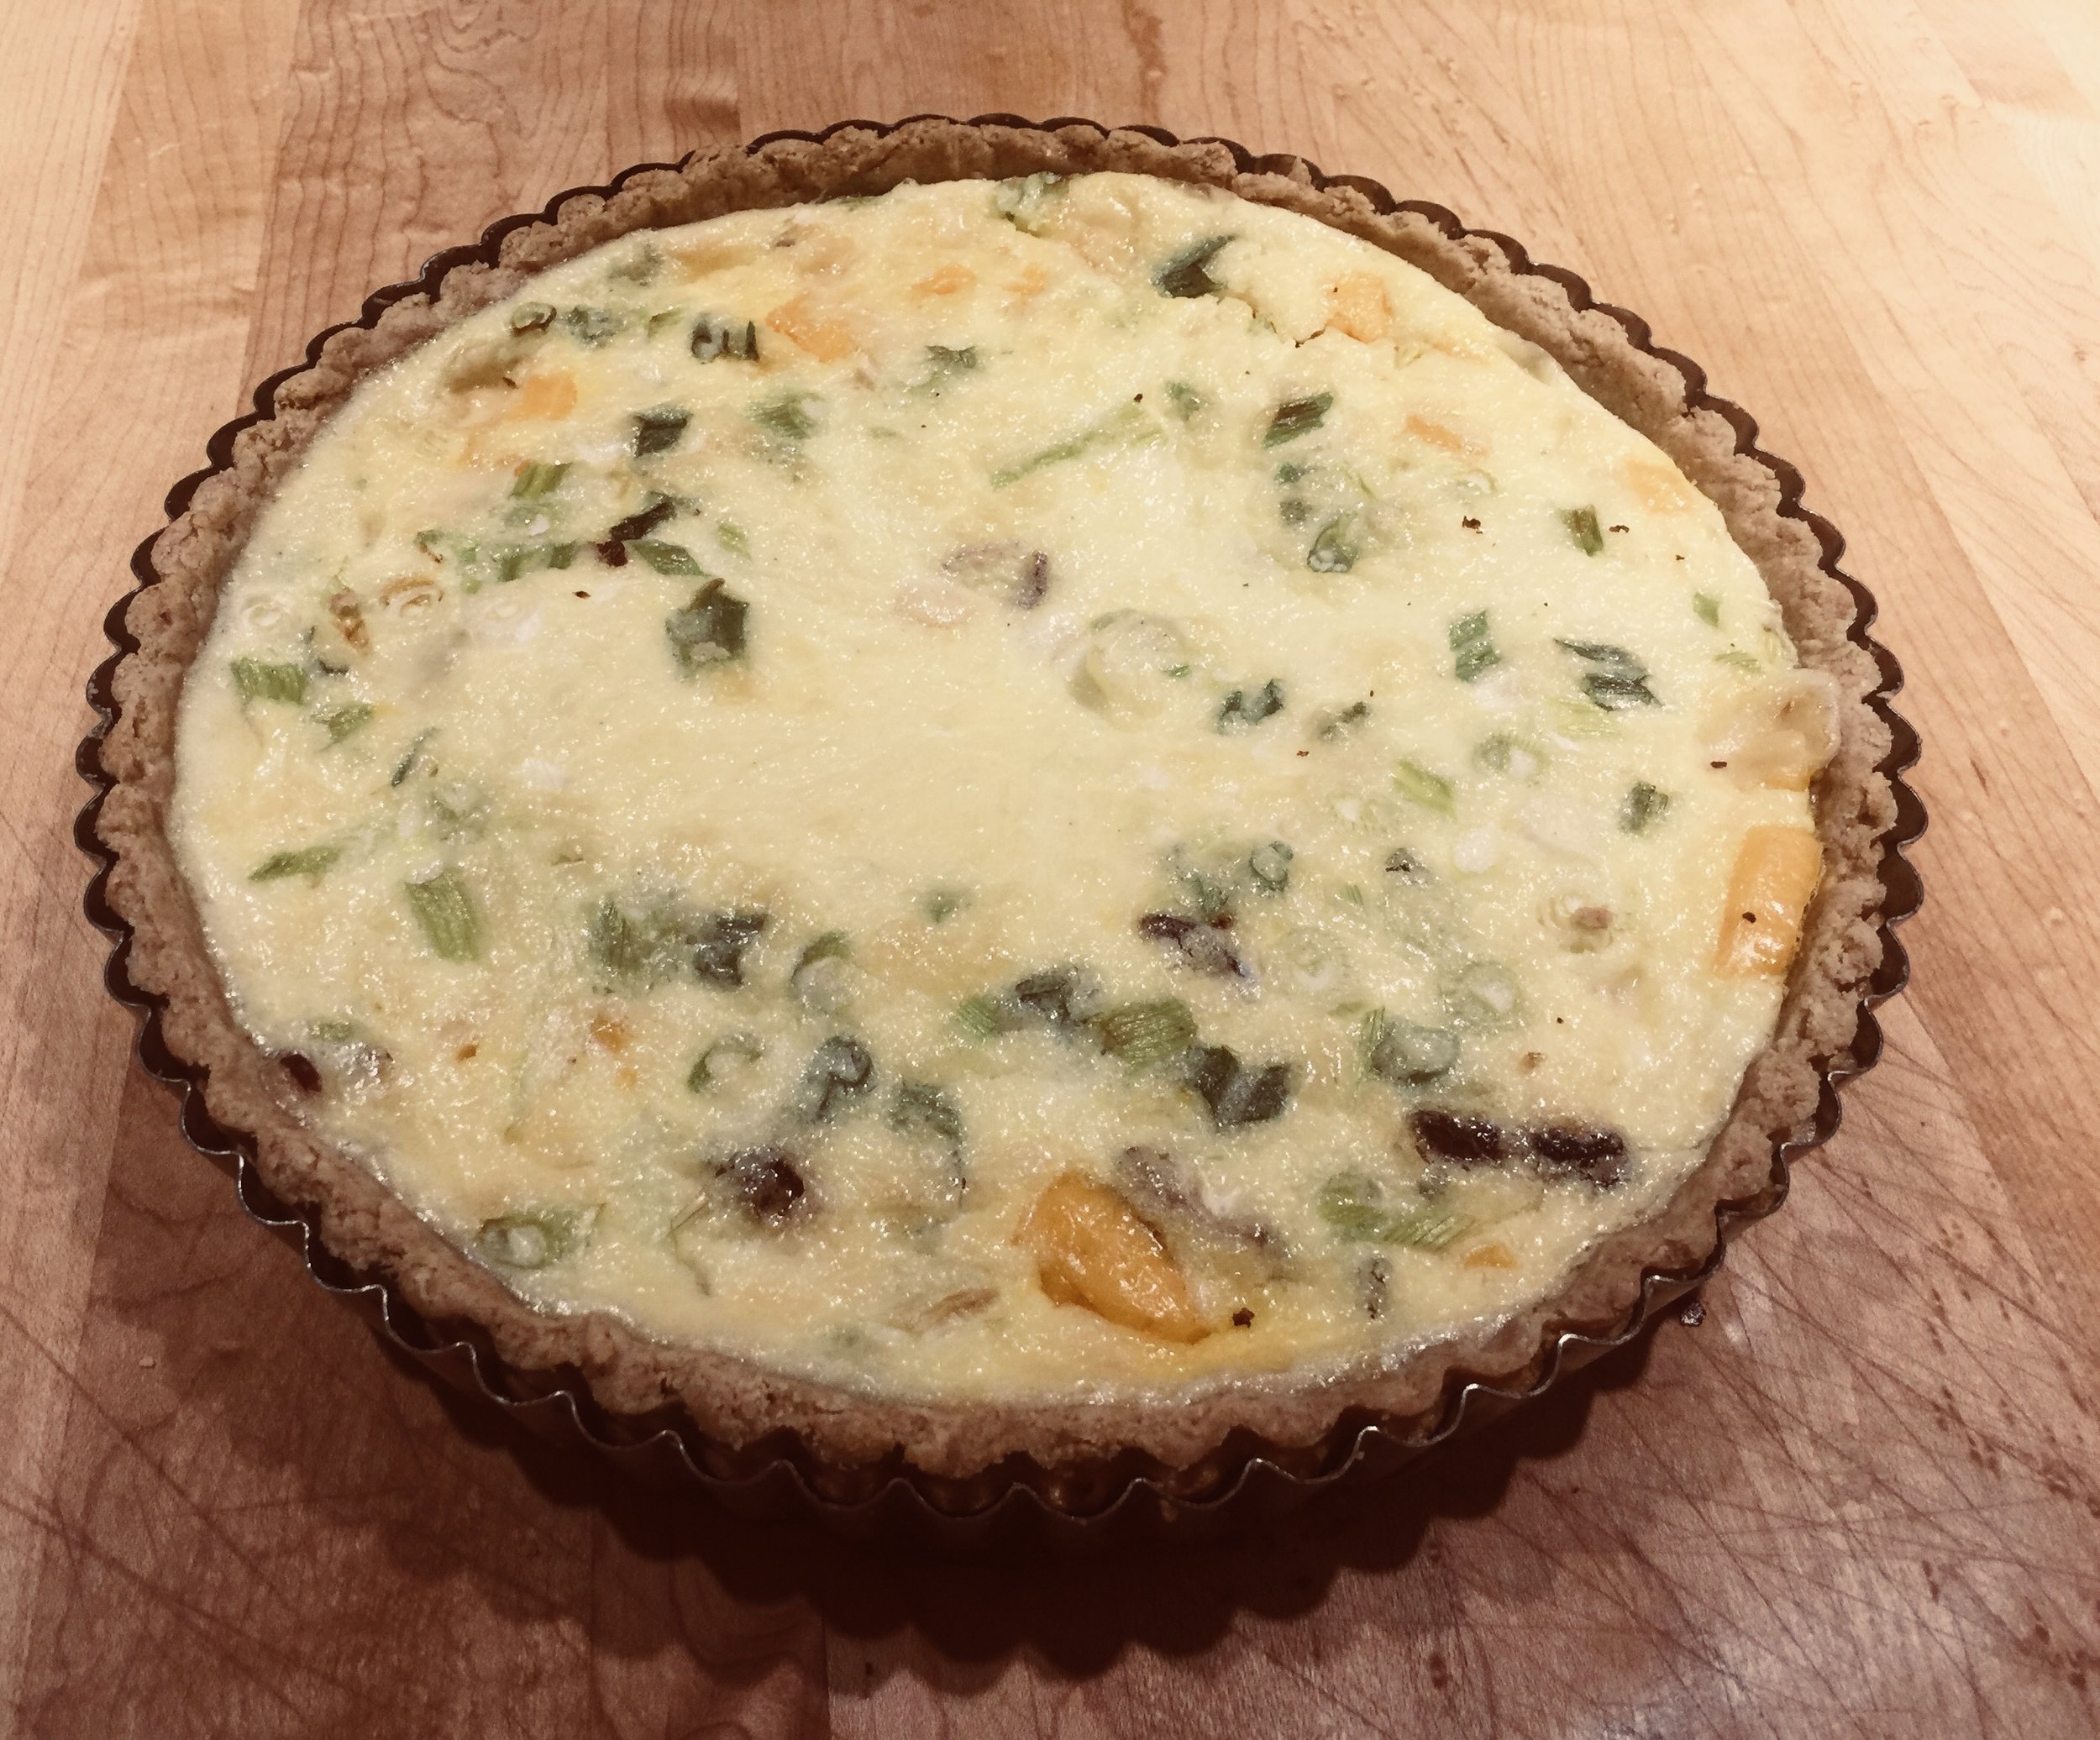
This pie crust can be used for sweet or savory pies. I don't usually adjust the sugar (I heard your question, bakers) it is not enough to throw off a savory pie like a quiche. Mainly it is there to give your crust a beautiful color. The sugar encourages caramelization.
The dough can be made up to 1 month in advance and frozen, thaw in the refrigerator overnight or up to one day ahead. Wrap in plastic wrap and then foil. Why - wrapping in foil blocks light - a little extra insurance that your dough will not turn gray or oxidize.
Here is the recipe: Gather your ingredients and mix right along with me. Let's bake!
Yield: Enough dough for three pie crusts
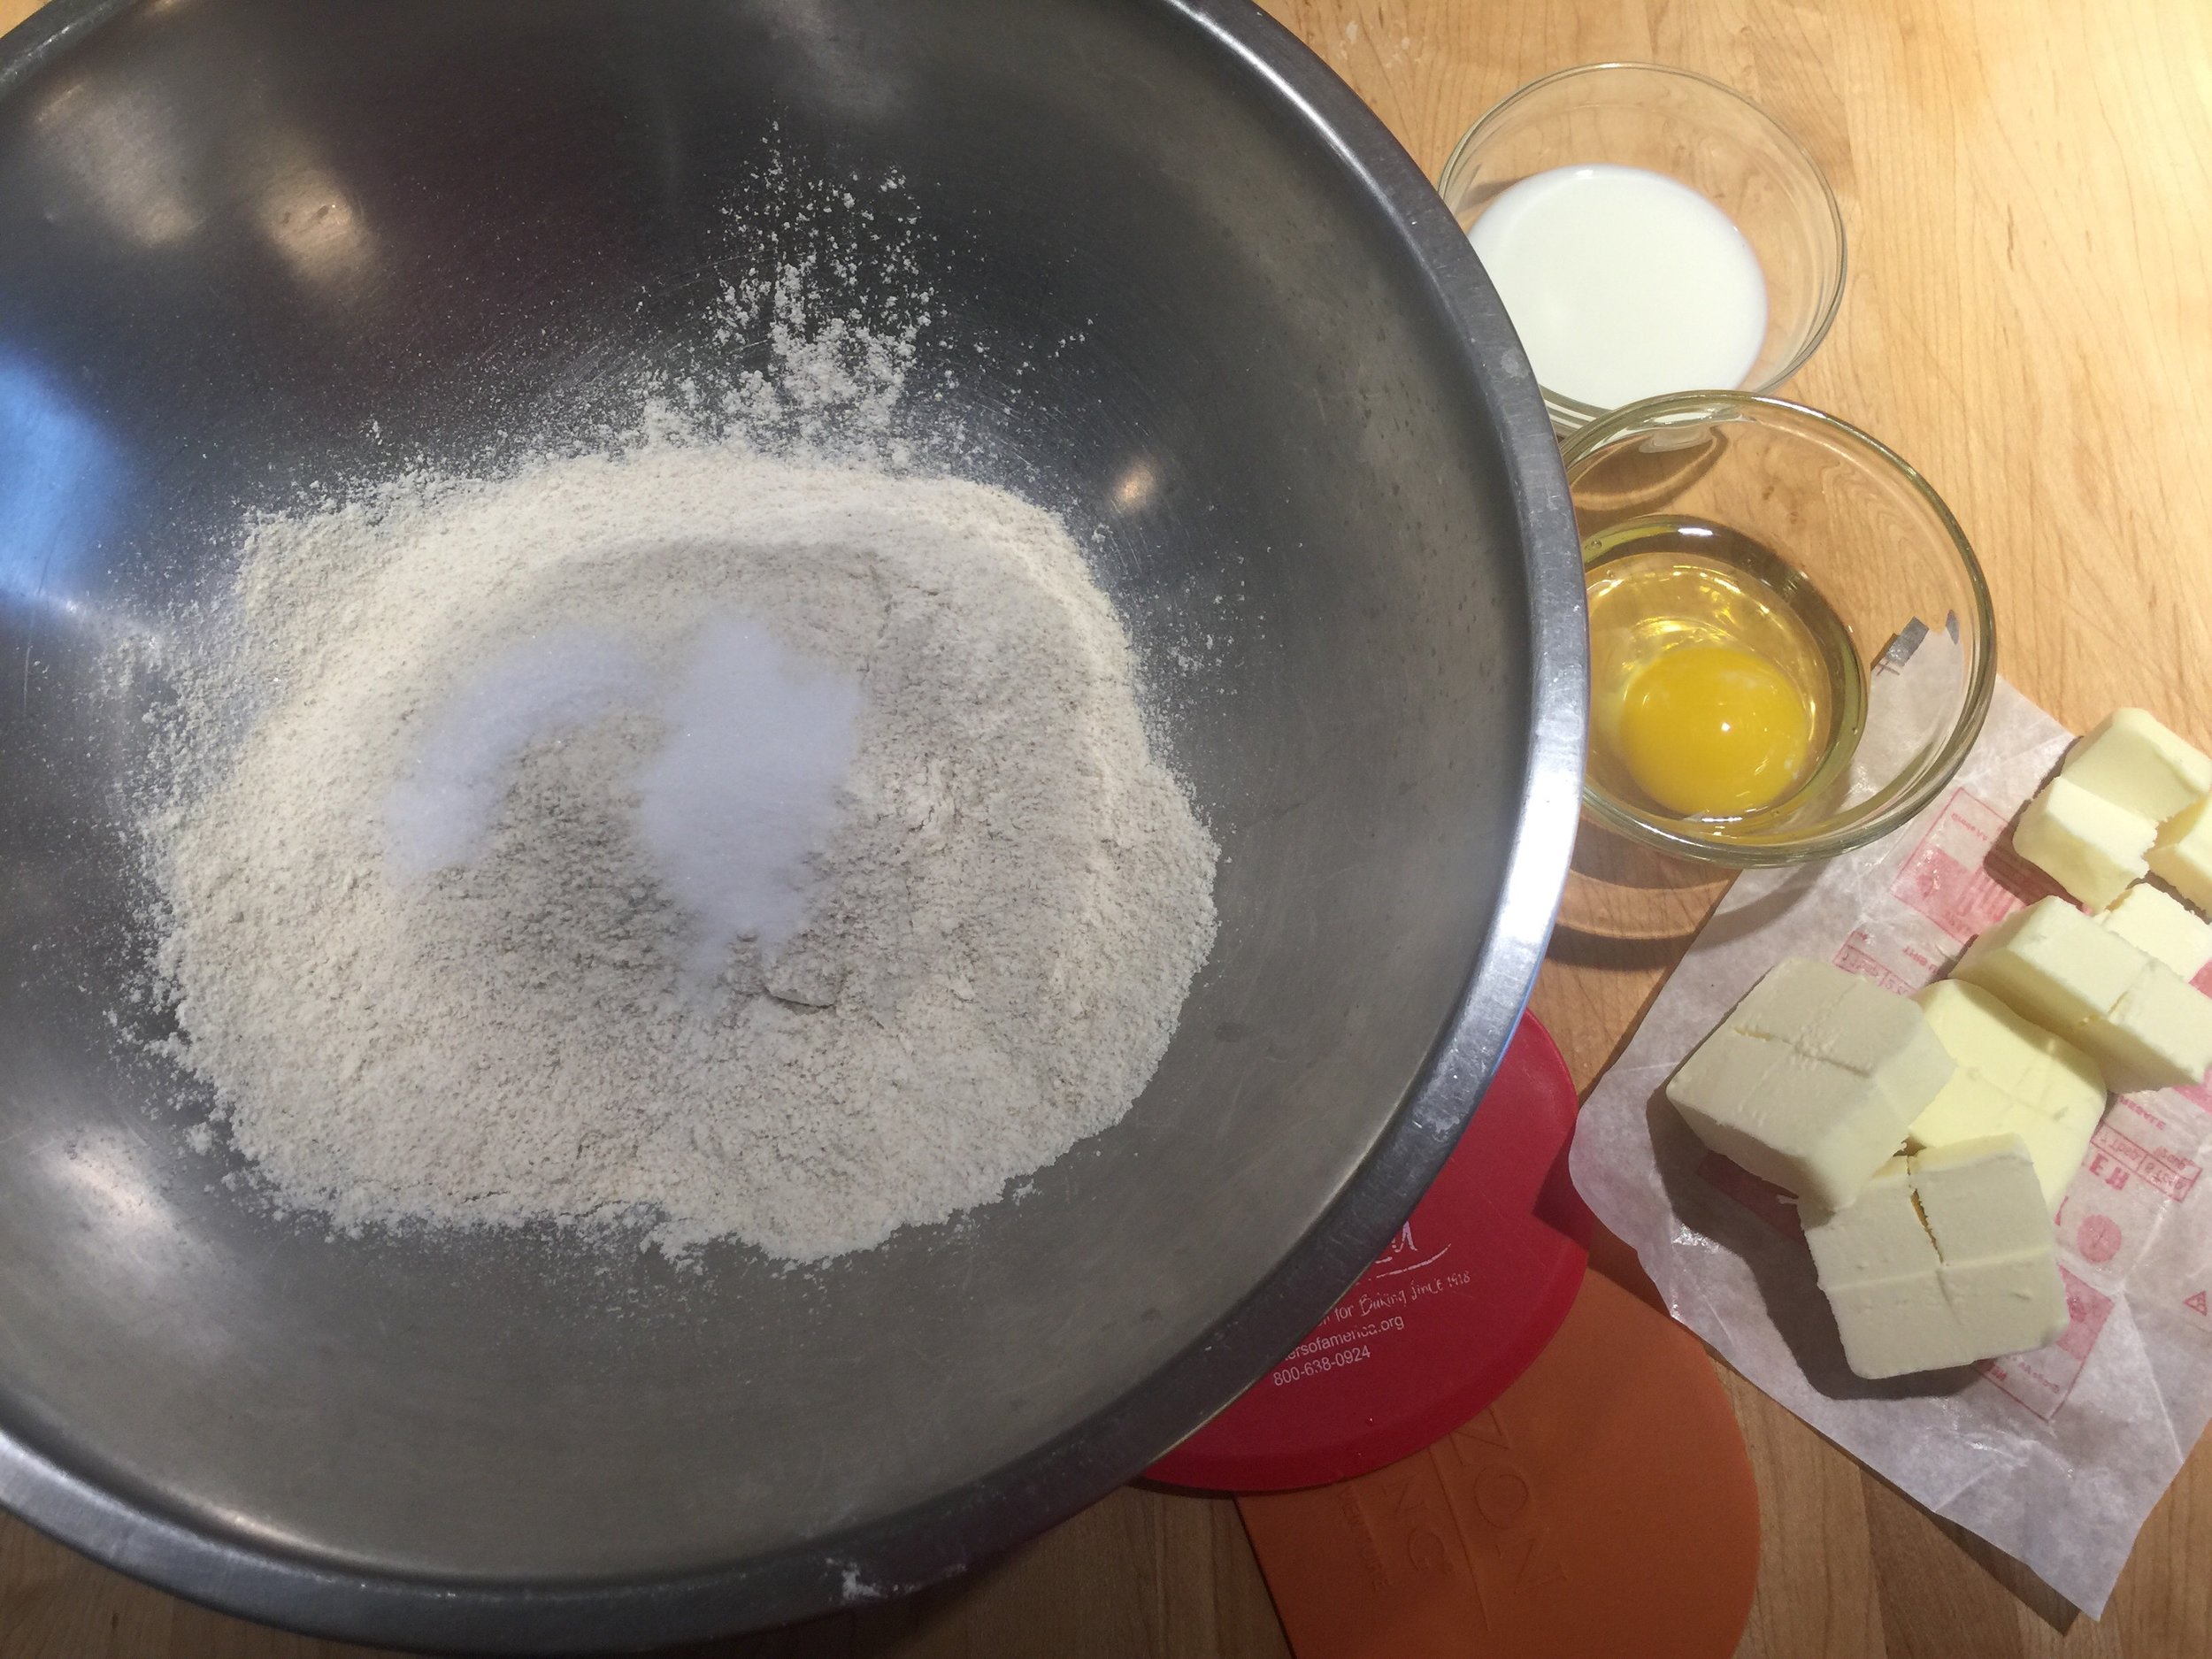
- 16 ounces (454g) of unbleached all purpose flour
- 1 Tablespoon, 1/2 ounce (15g) sugar
- 1 teaspoons, (6g) salt
- 5 ounces (170g) butter - cubed and chilled
- 102g shortening - chilled or frozen if possible
- 4g (1 teaspoon) apple cider vinegar or lemon juice
- 150g plus extra ice cold water ***please weigh this out and pour off the ice. Ice in the water will throw off the weight
- Place the flour, sugar and salt in a large bowl.
- Add the chilled butter. Using a bowl scraper or pastry blender, cut in the butter until it looks like corn flakes, lightly coated with flour.
- Sprinkle the apple cider vinegar on the butter and flour mixture.
- Add the shortening and cut it in too - even frozen it will break down quickly. The pieces of both butter and shortening should be uniform in size and be about the size of peas.
- Sprinkle the 150g of cold water on top of the mixture. As shown in the video, begin to fold the water into the dough - working from the side of the bowl and "folding and mashing it" into the center. Do this until the dough is a semi cohesive mass. Check for dryness on the bottom of the bowl - add water if necessary (1 tablespoon at a time) - drizzling it around the side of the bowl and then use the bowl scraper to work it through the dough - check again.
- Once the dough is a cohesive mass and you can lift it off the bottom of the bowl and there is no residual flour - dump it out onto your work surface. Shape into a flat disk (about 1/2 inch thick), wrap in plastic wrap and chill for a minimum of one hour. If making the night before or freezing, wrap in plastic wrap and then foil.