• Home
  • Recipes and Blogposts
  • TheDoughDr Archived Episodes
  • About
  • Ingredient and Baking Videos
Menu

Baking With Colette

Certified Master Baker, Craftsy Instructor, Teaching you to bake your best!
  • Home
  • Recipes and Blogposts
  • TheDoughDr Archived Episodes
  • About
  • Ingredient and Baking Videos

Looking for a perfect bake? Search Recipe and Blogposts below:


Subscribe

Sign up with your email address to receive news and updates.

We respect your privacy.

Thank you!
I am a Craftsy Instructor. www.craftsy.com

I am a Craftsy Instructor. www.craftsy.com

Tweets by BakingwColette

Red Velvet Wedding Cake with Vanilla Bean Buttercream #nakedcake #pastrychef #amoretti #redvelvetcake #baking #laweddings Macaron madness at Art Institute - for Portfolio Show! Rose petal shells with Champagne buttercream and S'mores....#amoretti #macaron #pastrychef #baking
You made it to Friday - indulge with a chocolate chip scone...#5250 #pastrychef #baking #delicious Mini Apple Pies ready for the case at #5250 cafe! Fall baking is in full swing. #baking #fallbaking #apples #applepie #pastrychef #amorettiarmy Croissants fresh out if the oven at 5250 Cafe. #croissant #5250 #amoretti #pastrychef #baking #foodporn Tango Apple Cake with Caramel Icing - new recipe post at BakingwithColette.com. Get inspired for your fall baking today #apples #baking #cake#caramel Cranberry Orange Scones for 5250 Cafe.  Perfect with morning coffee.....Start your day with something sweet. #baking #amorettiarmy #baker #bakery##5250 Chef Rossi competing at Art Institute of Los Angeles - ACF category cold plating desserts :)
Go Chef!!!! #plated desserts There is a theory that Brioche a tete were modeled after Marie Antoinette's breasts -!if true then she was the patron saint of small breasted women. These are so yummy and delicious. #baking#marieantoinette #delicious #brioche#5250 #bread

Bacon, Egg, Cheese and Scallion Muffins - Breakfast Perfection

October 31, 2016

Hello Bakers,

Before we jump into Thanksgiving baking, I thought it might be fun to recreate this new San Francisco treat. The Breakfast muffin debuted a few years ago at a popular SF bakery, Craftsman and Wolves. My son who lives in SF would describe this mythical muffin and the lines of people waiting in the early morning to get one.

I thought about this muffin from time to time and knew one day that I would recreate it here on the blog. But every time I visit SF, my flight always comes in too late to run to the bakery and get one. Somehow during my visits we never seem to get back to Craftsman and Wolves...

Fast forward to last August, I happened about a well thumbed Martha Stewart Living magazine. in the doctor's office and (OMG) there was a photo of the muffin and a recipe. My heart jumped with excitement as I started to read....

....but the recipe was awful - awfully written that is. I was pretty crushed, not because I needed more but that this kind of shoddy recipe writing had actually been printed. "How bad?" I hear you asking, gentle reader. Well the ingredient list was incomplete - there were ingredients listed in the body of the recipe - you know the ones you have to stop and go get or worse miss and then you have a mess and not the delicious expertly photographed treat. I find this kind of recipe writing supremely irritating and I was very disappointed in Martha. I had once adored her magazine - just the idea that a dwelling could be so clean, perfectly organized and food so beautifully arranged just blew my mind. I am sure there are a few of you out there who remember some of those stunning issues. Ok, no more nostalgia - back to baking...

This muffin I decided would be perfect for the pastry case and this blog - so I went to work on the recipe.

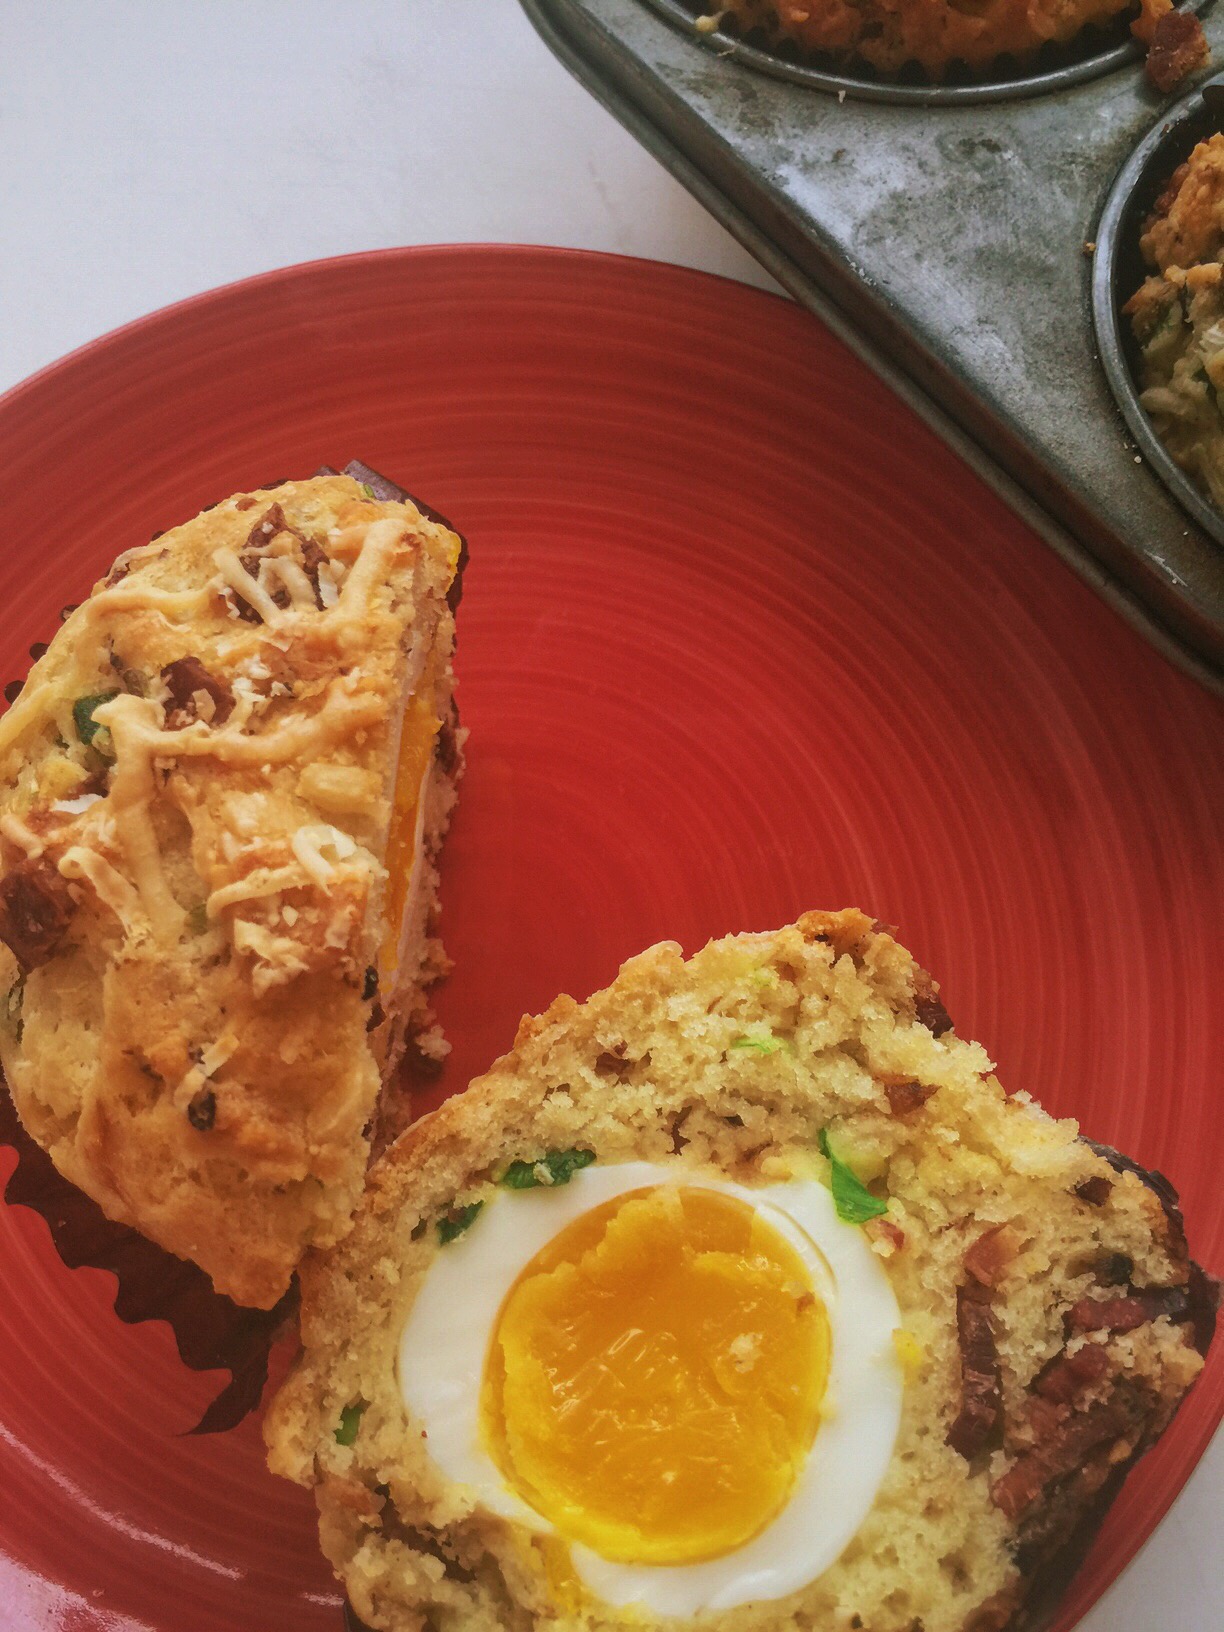
Here is the recipe I now make every day - those of you who follow me on Instagram saw it last week. It was a bit of a challenge to work out the timing of the egg - five minutes was close to perfect. The yolk finishes cooking as the muffin bakes. Yum....

Now you can make this at home. You can substitute your favorite breakfast meat for the bacon - turkey bacon works too.

Happy Baking!

Colette

Breakfast Muffins

Equipment

Large muffin tin

Scale

Sifter

3 medium sized mixing bowls (2 for mixing, 1 for ice bath)

Spatula

Teaspoons

Paper liners to fit muffin tin

1 saucepan

Optional: #20 scoop, yellow and #16 scoop, blue

Timer

Muffin post 2.JPG

Ingredients

6 eggs **the older the eggs the better they will peel after cooking

9 ounces (255g) All purpose flour

2 Tablespoons, 1 ounces (28g) sugar

1 teaspoon Baking powder

½ teaspoon Baking soda

½ teaspoon fine sea salt

2 eggs (for the batter)

½ cup, 4 ounces, (113g) Vegetable oil (I prefer corn oil for baking)

½ cup, 4 ounces, (113g) Buttermilk or sour cream

¼ cup, 2 ounces (57g) water

1/8 cup, 1 ounce, (28g) chopped green onions

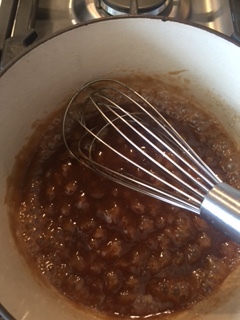
¼ cup, 2 ounces, (57g) crisp bacon chopped fine (about 6-8 slices)

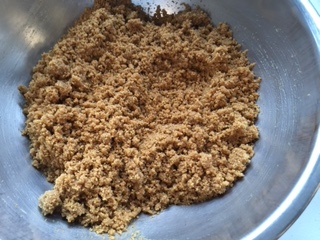
½ cup, 4 ounces, (113g) Parmesan, Asiago or Cheddar cheese

2 ounces extra cheese for a prebake sprinkle

Preheat oven to 350 degrees

1. Place the 6 eggs in the saucepan and cover with water. Bring to a rolling boil. Boil for 5 minutes.

muffin post 12.JPG

Pour the water off the eggs and dump them into the ice – make sure all the eggs are submerged.

Let chill for several minutes and then peel.

2. Sift together the dry ingredients. Set aside.

3. Combine the eggs, oil, buttermilk or sour cream and water.

4. Add the dry ingredients to the wet ingredients, try to use as few strokes as possible, 15-20 maximum.

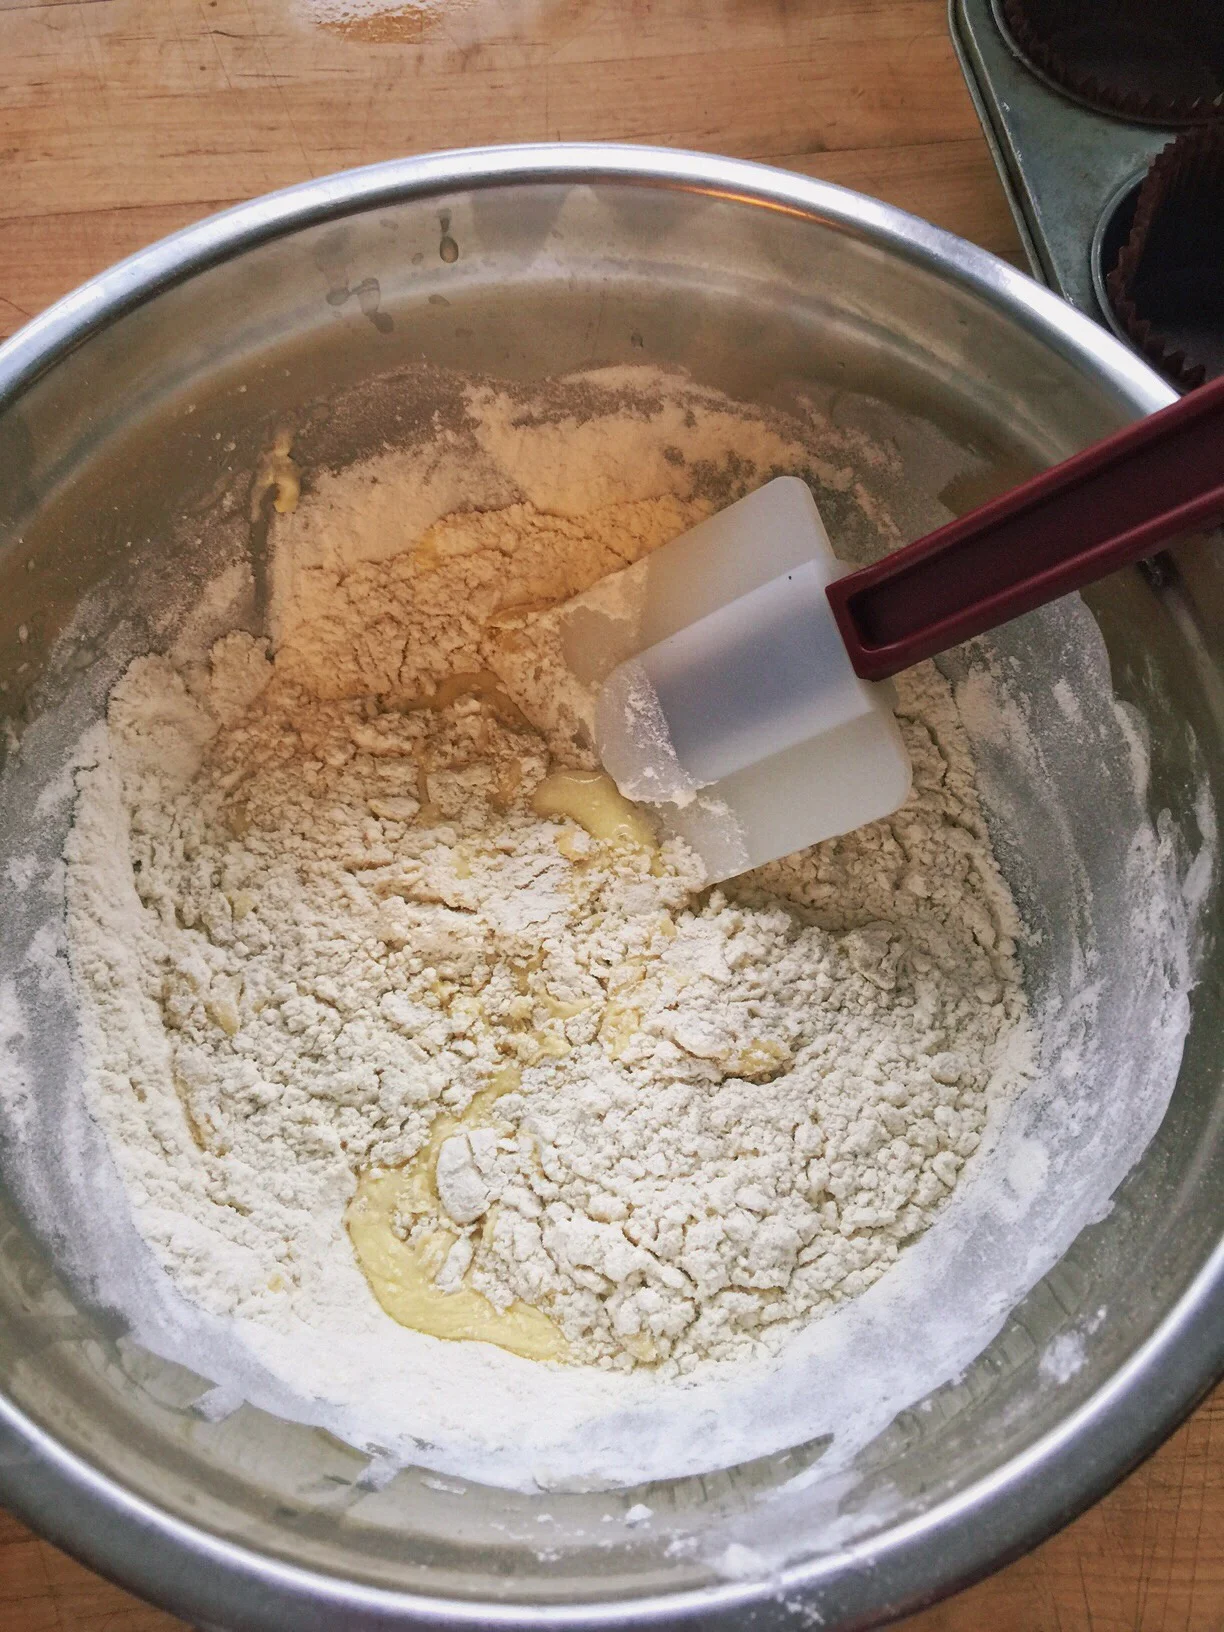
5. Add the green onions, bacon and cheese.

muffin post 11.JPG

6. Using the larger scoop or a large spoon, scoop or spoon batter into the lined muffin tin.

7. Place an egg, larger side down in each muffin cavity.

8. Using the smaller scoop or less of a spoonful on top of the egg, covering it completely.

9. Sprinkle tops of muffins with the additional cheese.

10. Start checking in 22 minutes, (mine took 25 but every oven is different). A skewer inserted in the center should come out clean.

11. Let cool for a few minutes in the tin. Serve warm and enjoy!

12. Leftover muffins should be kept well wrapped in the refrigerator.


2 Comments
This is a delicious old fashioned cake and an old fashioned photo - I pulled out my mother's wedding china for this shot. 

This is a delicious old fashioned cake and an old fashioned photo - I pulled out my mother's wedding china for this shot.


Tango Apple Cake with Caramel Icing

September 05, 2016

Hello Bakers,

It is hard to believe it is September! I have been working so much developing the pastry case at work and teaching that I hadn't even noticed. It was the display of apples at Whole Foods DTLA that made me realize that Summer was over.

And now it is Labor Day weekend (#grateful) and I have a chance to write this post and connect with you. 

Today's recipe is Tango Apple Cake. This is an easy one to put together. Bakers,  I know that you are busy and that a great effortless recipe might be more appealing then a showstopper recipe at this point.

Not that I don't love a good showstopper, multi components, stand on your head recipe but let's  save those for the holidays when we all have a bit more time.

This cake is really yummy and I wish you smell how great the kitchen smells after baking this. The caramel icing is a bit old fashioned (it is made on the stove) and so delicious. It has coffee in the recipe (which adds richness and depth but not strong coffee flavor). 

I used Tango apples because they are a variety that I have not used before - I used two in the cake and made applesauce with the rest, yes that was yummy.  The tango is a nice all purpose apple - good for eating out of hand too. You can also use granny smith, golden delicious, gala and macintosh. 
Fuji and Red delicious I tend to avoid for baking they are a better eating apple or served raw in a salad.

Please try this out and let me know what you think. I am so happy to finally send you a new recipe. I promise to send more soon.

Let me know if you have questions. 

Happy Baking!

Colette

Apple Cake with Caramel Icing

Equipment:

Stand or Hand Held Mixer

Sifter

Spatula

Grater

9” Cake pan – SPS spray (or brush with pan spread) parchment paper circle, spray or brush with spread

ingredients

4 ounces (113g) unsalted butter, cubed and slightly softened

7 ounces (198g) sugar

1 teaspoon vanilla

2 eggs

6.75 ounces (191g) All purpose flour

1/2 teaspoon fine sea salt

2 teaspoons Dutch process cocoa

½ teaspoon baking soda

½ teaspoon cinnamon

1/8 teaspoon ground cloves

1/8 teaspoon nutmeg


4 ounces cold coffee

2 apples,  peeled and grated.

4 ounces (113g) toasted, chopped walnuts


1. Sift together the flour, cocoa, baking soda, salt, cinnamon and nutmeg set aside.

2.  In the mixer fitted with the paddle attachment, cream the butter, sugar and vanilla until light and fluffy – about 6-8 minutes at medium speed.

3. Add the eggs mixing on low speed for 20 seconds and then medium speed for 25 seconds until the eggs are well combined and the mixture looks dull.

4. Next add 1/3rd of the sifted dry ingredients, mix on low speed just until combined. Add half the coffee then another 1/3rd of the dry ingredients, finish with the remaining coffee and dry ingredients.

Second increment of coffee is added

Second increment of coffee is added

5. Fold in the apples and walnuts on low speed just until combined.

Apples and walnuts ready to mix in.

Apples and walnuts ready to mix in.

6. Spread batter in prepared pan.

IMG_1494.JPG

7. Bake at 350. Check in 30 minutes. The cake is done when a skewer inserted in the center comes out clean. My cake took about 42 minutes - after the 30 minute intital check, I continued baking in 6 minute intervals, turning the oven down to 325 to prevent over browning.

Finished baking - note how it should pull away slightly from the edge of the cake pan.

Finished baking - note how it should pull away slightly from the edge of the cake pan.

8. Let cool on a rack.

When the cake is cool, prepare the Caramel icing

Caramel icing

Equipment:

Medium saucepan

Whisk

Heatproof spatula

Ingredients

2 ounces (57g) butter

3.75 ounces (106g) brown sugar

2 Tablespoons (30g)milk

6 ounces (170g) sifted powdered sugar

1 teaspoon vanilla extract or vanilla bean paste.(I used Amoretti vanilla bean paste) regular vanilla extract is fine too.

Caramel icing mise en place

Caramel icing mise en place


1. Melt butter in the saucepan, add brown sugar and cook over medium heat, stirring for 2 minutes.

Butter and brown sugar - cook two minutes on medium/low heat

Butter and brown sugar - cook two minutes on medium/low heat

2. Add milk and bring to a boil, remove from heat.

Milk has been added and it does thin out.

Milk has been added and it does thin out.

3. Add sifted powdered sugar and whisk until smooth and creamy.

Adding the powdered sugar is scary at first but just keep whisking. 

Adding the powdered sugar is scary at first but just keep whisking.


4. Add vanilla.

Finished icing.

Finished icing.

Thin with milk if necessary. Because of the cornstarch in the powdered sugar, the icing may develop a crust to prevent this make sure to keep it covered and rewhisk befoe using.

Let cool slightly before icing the cake.

Finishing:

Cake and Icing ready to go. notice the parchment strips tucked under the cake (about 1" from the edge) to protect the serving plate.

Cake and Icing ready to go. notice the parchment strips tucked under the cake (about 1" from the edge) to protect the serving plate.

Spread icing on cake with an offset spatula - this is simple decorating and should be done quickly. 


2 Comments
20160718_102408.jpg

"420" Bars - My Best Selling Bar Cookie

July 23, 2016

Hello Bakers,

These past few weeks have been so busy. At work we recently acquired a pastry case and it is my job to fill it. The pastry case is part of the  school cafe. It has to be set up by 7:00 AM - which means I am in the kitchen at 5:00. It takes about a half hour for my oven to heat up so being late is not an option - I have to start loading it by 5:40 or the pastries will not be out on time. 

Having a case is exciting. It is a fair amount of responsibility and a daily place to showcase work. By the end of the day it is empty or almost empty and the next day I have to start all over - well almost.

I do have some things made ahead - all professional bakers do or else we would never be able to keep up and would most likely run screaming into the woods. This actually happened to one of my baking instructors at school - in a future post I will recount that tale..

Having a pastry case is a daily testament to the old saying "if you build they will come". Each day more product sells...and then I have to increase production, be more creative and work faster. It's exhausting and exhilarating at the same time. I wish this was all I was doing but I am also teaching a full load so it is a little tiring but I am just trying to push through. I am grateful for my student's help. 

The first week I was cautious and getting up speed, By the second week I was faster and able to add more desserts, this week is the third week and we will see what happens.

One item sells better then any other (so far) and that is the quick and easy "420" bars. Our cafe manager named them as I am told they are the perfect sweet treat when an attack of the munchies hits.  

These also are quick to make if you need a a quick bake sale or classroom treat. Might be better to call them "Magic Bars" in those instances.

As the weeks go on I will be adding more and more to the case - I will share my most popular recipes with you, my bakers, right here on the blog.

Happy Baking!

Colette


And finally the recipe for "420" Bars...

Yield: 15 large bars

24 small bars

Equipment:

2 1/2 sheet pans

Medium bowl

Microwave or saucepan for melting butter

Plastic wrap

Parchment paper

2 tablespoons melted or softened butter for greasing the pan.

If you have “pan spread”** on hand you can use that. Recipe is right below.

Pan Spread

An easy do it yourself pan spread that is better for your baking and the environment.

Small saucepan

Whisk

1 stick, 4 ounces, 113g unsalted butter or vegetable shortening

2 Tablespoons, 1 ounce, (28g) unbleached all purpose flour

In a small saucepan, melt the butter or shortening over medium heat.

Turn off heat, add flour and whisk until smooth.

Pan spread made with butter lasts for two weeks in the refrigerator, made with vegetable shortening lasts six months in the refrigerator.

How to use: Brush on pans whenever the recipe calls for spray.


Back to the bars....


Ingredients:

10 ounces graham cracker crumbs

8 ounces melted butter

8 ounces toasted and chopped pecans – you could also use walnuts or macadamia nuts

12 ounces chocolate chips

6 ounces butterscotch chips

6 ounces white chocolate chips

2 cans (15 ounces) sweetened condensed milk

IMG_0945.JPG


1.  Preheat the oven to 350 degrees.

2. Prepare your pan by lightly greasing the sides and bottom with melted butter or brushing with

Pan spread. Line the pan with parchment paper cut to allow a 1” overhang above the lip of the pan.

3. Combine the graham cracker crumbs and butter in the bowl and stir until the crumbs are moistened.

Graham Cracker Crumbs and Melted Butter

Graham Cracker Crumbs and Melted Butter

4. Dump the crumbs and butter in the pan and distribute evenly in a thin layer.

Packed Crumbs 

Packed Crumbs 

5. In order to get a nice packed crust cover the crumbs with plastic wrap and press another sheet pan on top of the plastic. Remove pan and plastic wrap.

Plastic wrap over crumbs...

Plastic wrap over crumbs...

Press down hard to get a compact crust.

Press down hard to get a compact crust.

6. Sprinkle the pecans evenly over the surface of the crust.

7. Sprinkle the chocolate chips evenly over the crust .

8. Sprinkle the butterscotch chips evenly over the crust

9. Sprinkle the white chocolate chips evenly over the crust

Chip ahoy

Chip ahoy

10. Carefully pour the two cans of condensed milk over the crust.

Pour condensed milk evenly over the surface

Pour condensed milk evenly over the surface

11. Bake at 350 for 25-30 minutes.

12. The bars should be an all over light golden brown.

Perfect golden brown.

Perfect golden brown.

If possible let them sit for 45 minutes before cutting.

They store well in an airtight container if there are any left over.

These are a spin on a classic bar cookie that has several other names - magic bars, layer bars, etc. But I think you will like my take on them.

They are quick and easy - they can be made in under an hour. 

Let me know if you have questions.

Happy Baking!

Colette

"420" Bars

Comment
Bluebery and Pecan Cakepie - Bursting with Berries

Bluebery and Pecan Cakepie - Bursting with Berries

Blueberry and Pecan Cakepie, has No Crust! and can be Gluten Free

June 20, 2016

Hello Bakers,

It's the first day of Summer and hot here in Los Angeles. This is not the time of year to spend a lot of time in the kitchen. 

It's not an easy time of year for us bakers, as we still love to bake.  Also, everyone still expects the delicious treats to keep on coming, despite the heat. If you are reading this blog then I know you are THE ONE always makes or brings dessert.

As the designated baker we need good recipes in our repertoire. I feel it is my job to develop great recipes, feature them here for you to try and enjoy.

Today's recipe is an old fashioned dessert that used to be called a "Betty". It is in the category of desserts that are made with fruit and called "slumps", "grunts", "pandowdies" and "crisps".

A "Betty" has the distinction of using melted butter in the topping while the rest of the category use cold cubed butter in the base or topping. I am a very old fashioned girl at heart but "Betty" seemed a little too retro. So instead I am call it a "Cakepie". It is baked in a pie pan, is full of fruit but the batter that lightly holds the mix together has a cake like texture

This is very quick to mix - you can have ready to go - start to finish in about an hour and five minutes. It can cool in the car as you head off to your next summer party.

I used blueberries and pecans because I think they are good flavor partners...but you can use any combination of fruits and nuts. It takes a minimum of 6 ounces of berries or cut up fruit.

You can leave the nuts out and it also works with gluten free flour (what an oxymoron) making it just about perfect. If you use a disposable pie pan you won't have to worry about getting your dish back. 

I hope you enjoy this recipe, Bakers. Please let me know.

Happy Baking!

Colette

No Crust Blueberry Pie Cake Pie with Gluten Free Option


Equipment:

2 medium sized bowls

whisk

spatula

9” pie pan, buttered or sprayed with pan spray


4.25 ounces unbleached all purpose flour or gluten free flour

¼ teaspoon sea salt

½ teaspoon baking powder


4 ounces butter, melted

6 ounces sugar

2 large eggs

Zest of one medium lemon

Juice of one lemon

1 teaspoon vanilla extract or vanilla bean paste

½ teaspoon lemon extract (optional)

2 ounces toasted and chopped pecans

1/2 pint blueberries 


Preheat oven to 350 degrees.


1. Whisk the flour (or gluten free blend), salt and baking powder together, set aside.

2. Whisk together, sugar, butter, eggs, lemon zest, lemon juice, vanilla and optional lemon extract.

Wet (before mixing) and Dry Ingredients

Wet (before mixing) and Dry Ingredients

3. Add the dry mixture to the wet mixture. Fold the two together just until they are combined.

    Do not over mix.   

3. Fold in blueberries and pecans.

4. Pour batter into pie plate.

5. Bake at 350 and start checking in 25 minutes. The cakepie is done when a skewer inserted in the center comes out clean. if it starts to take on too much color then reduce the temperature by 25 degrees and finish the bake. Mine took 37 minute - make sure it is done - if you think that it needs more time - then give it another 5-7 minutes and check again.

Dust with powdered sugar and serve with ice cream or whipped cream.


Comment
Newer / Older
Back to Top

email: bakingwithcolette@gmail.com